4 sticks of butter (salted sweet butter)
2 cups of white sugar
1/4 teaspoon salt
1 (12 oz.) bag of semi-sweet chocolate chips
1 and 1/2 cups of crushed roasted almonds
That's it, just 5 simple ingredients, and you are ready to go! I don't always use a candy thermometer to make this because I have made it so many times, I can tell by the color of the butter/sugar mixture when it's done, but if you aren't confident with my method, by all means, get a candy thermometer if you don't already have one before making this toffee.
Here we go....
First of all, cover a sheet pan with foil and spread softened butter thinly onto the foil.
Then, before you begin the cooking process, get your almonds ready by crushing them. I put them in a zip up bag and use my meat tenderizing mallet to do this. Regular roasted almonds are fine, but I prefer Squirrel Brand Crème Brulee Almonds because they add such a unique flavor you just don't get from any other toffee I have ever tasted, and it's so darn good! After you crush the almonds, pour the chocolate chips out into a bowl for easy grabbing and then you're ready to begin cooking.
Using a heavy-bottomed medium sauce pan, put the 4 sticks of butter, 2 cups of sugar, and the salt into it and turn the heat on to medium low.
 As the butter begins to soften, just break it up with your spoon and continue stirring and cooking at medium low heat until the butter is completely melted.
Once the butter is all melted, as shown above, turn the heat up to medium high and continue stirring constantly. It will thicken and begin to bubble.
As you continue to stir, the color of the mixture will start to darken. Once it starts to look about the color of a brown paper sack, here's where you will want to use your thermometer to check the temperature. You want it to be 285 - 290 degrees. When using a candy thermometer, only place it half way in, and don't let it touch the bottom of the pan, or you will not get accurate readings. Once it reaches that temperature, immediately remove it from the heat and pour it onto your buttered foil. To get to this point, using my gas stove top, it takes me about 13 minutes from the time I turn the heat to medium high. Yours may differ. I also don't generally use a thermometer and instead go by the color of the mixture to know when it's ready. For me, that's easy - it needs to be the same color as my coffee is after I put 2 spoons of creamer in it! From here on, you will need to work quickly, which is why your almonds and chocolate chips need to be ready to go.
When you pour the hot butter/sugar mixture onto the foil, it should spread out nicely over the foil. You may need to even it out a little with a spoon in the center, but it begins to set quickly, so you must work fast. Once it is evenly spread over the foil, immediately sprinkle all the chocolate chips onto the surface and allow them to sit there and soften for a few minutes.
After they have softened, use an off-set spatula (or what ever else you want to use) to spread the chocolate evenly over the top.
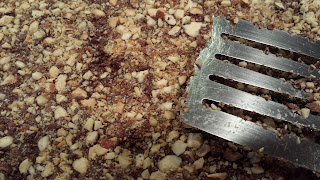
Next, sprinkle the crushed almonds all over the surface of the chocolate. I use a spatula to press the almonds gently down into the melted chocolate, but you can use the back of a spoon and it will work just as well.
Now, all that's left to do is allow the chocolate to set before you break the toffee up into pieces. I refrigerate it for at least 1 hour, then it releases easily from the foil so you can break it up and store it in air tight containers. There is no need to refrigerate the toffee once it's placed into air tight containers.
The bottom looks like this. Here's a perfect example of the color you are looking for!
Warning: This recipe makes quite a bit of toffee! Around my house, however, this presents no problem.
This toffee has a perfect soft crunch that doesn't stick to your teeth. If you like toffee, I encourage you to try it. The more times you make it the better you get at doing it - just keep in mind that advance preparation is important!
Now... excuse me, but someone in my kitchen needs to step up and do some quality control, so it may as well be me. Time for tasting!! xoxoxox


No comments:
Post a Comment