Saturday, January 11, 2020

Carb Friendly Cheesecake


I watched a cooking segment on the Today show during which Valerie Bertinelli showed how to make her Sugar Free Cheesecake.

It looked amazing and delicious, but I've had bad experiences with recipes using sugar replacements, so I have adapted her recipe into my version, which is not sugar free, but is very carb friendly. I did this because I was concerned about the aftertaste of the sugar replacement, Swerve. My goal was to add just a few additional ingredients in small amounts to help offset that aftertaste a bit. I've never used Swerve before, and as I tasted it right out of the package as I was using it, I immediately realized it was much better than any other brand I have used before in baking.  
Here's how I did it, and the entire list of ingredients and directions are listed below the images.


The crust, pressed into the pan and ready for the oven.


The filling, ready to pour into the crust.

The cheesecake, baking in a water bath.


Cooling, out of the bath and unwrapped.

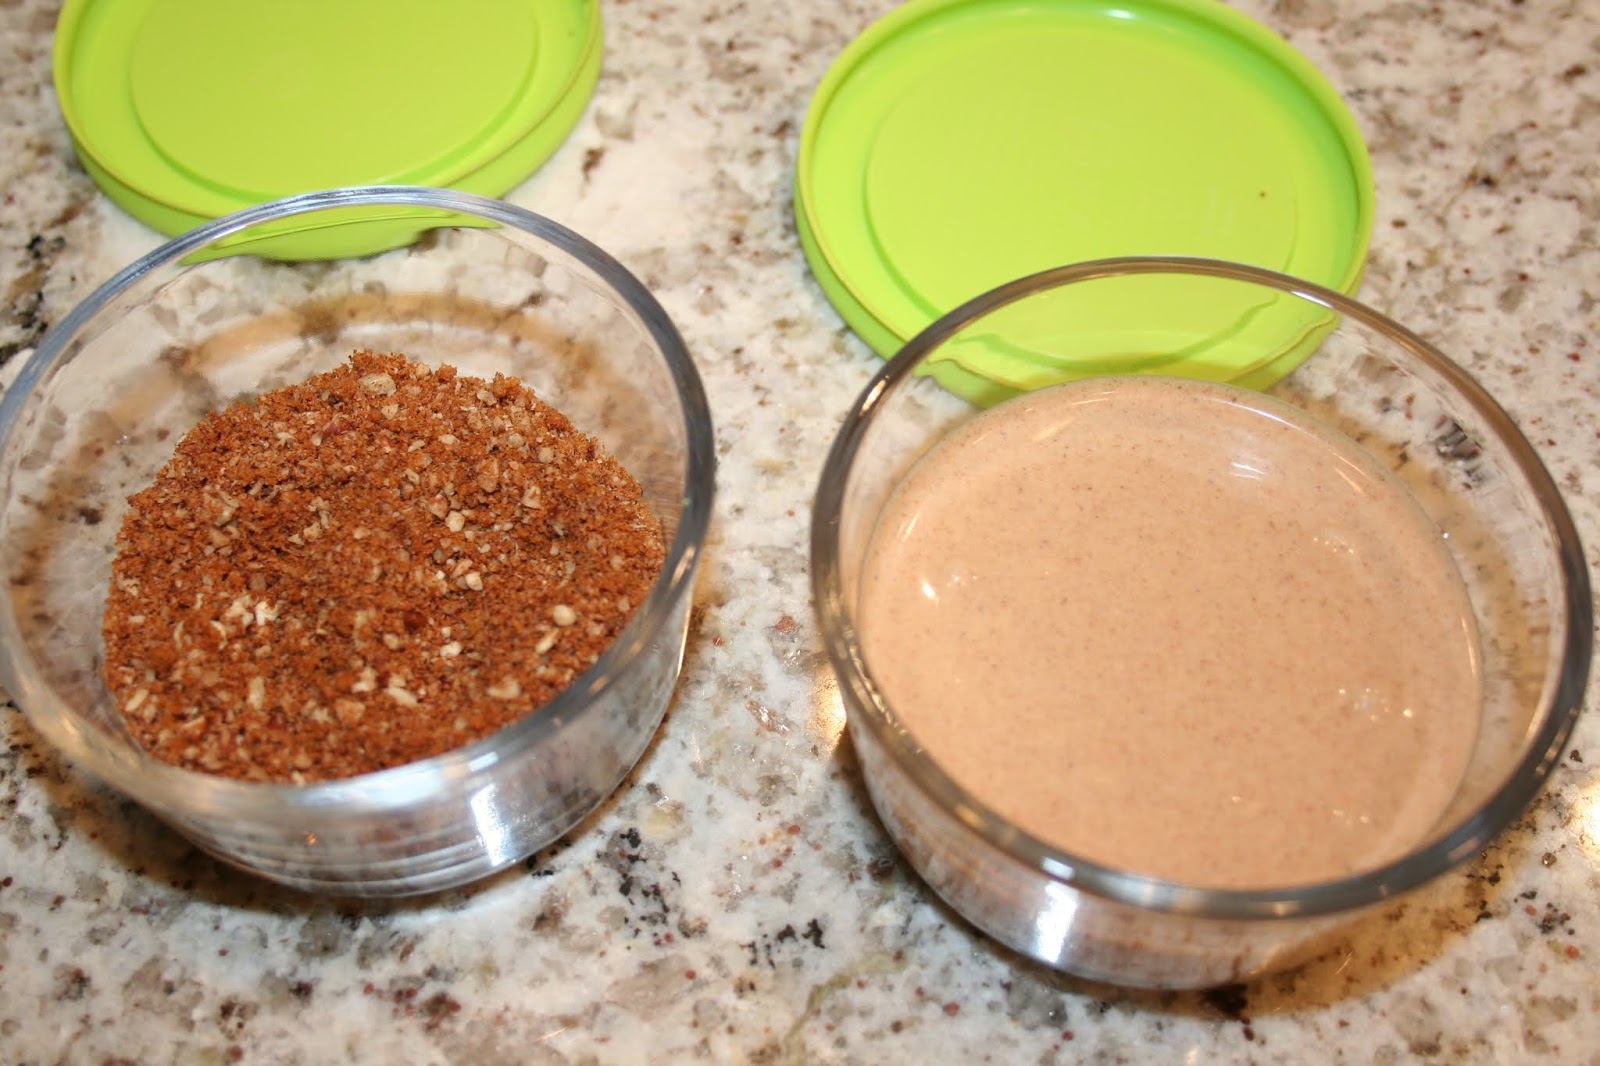
Optional toppings.


My little trick to get the glaze drizzled on in nice straight lines.

It's creamy, with a subtle flavor and cuts nicely! The crust is not overly sweet. True, it can't compare to all my fancy cheesecakes that I love to bake, but overall, I'm pleased with it and think it's a great option for enjoying cheesecake without consuming way too many carbs! I didn't find myself complaining about any undesired aftertastes at all!!

Side view, showing how the crust looks!


Spoon City Kitchen Carb Friendly Cheesecake

(Adapted from Valerie Bertinelli’s Sugar Free Cheesecake recipe)


Ingredients:
Crust:
1 ¼ cups almond flour
½ cup pecans
¼ cup Swerve powdered sugar replacement sweetener (not granulated)
6 tablespoons butter (NOT unsalted), melted
½ teaspoon ground cinnamon
2 Biscoff cookies

Filling:
5 (eight oz.) bricks room temperature cream cheese
2 cups Swerve powdered sugar replacement sweetener
1 ½ tablespoons ground cinnamon
1 teaspoon lemon juice
2 teaspoons vanilla extract
4 tablespoons apple butter
1/3 cup sour cream
3 large eggs


Optional Toppings:

Glaze:
Combine ¾ cup Swerve powdered sugar replacement sweetener, ½ teaspoon ground cinnamon, ½ teaspoon vanilla, 1 tablespoon apple butter, and 2 tablespoons whipping cream (not heavy) into a bowl and vigorously stir or whisk until smooth.  Gradually add small amounts of water at a time with a teaspoon and whisk until you get it to the consistency you desire.  Ideally, it should drizzle off the tip of a spoon easily without the thread breaking.   Drizzle in a criss-cross fashion over the surface of the cooled cheesecake.

Crumb Topping:
Combine a heaping handful of pecan halves, ¼ teaspoon ground cinnamon and 1 Biscoff cookie in food processor and process to a medium fine crumb.  Sprinkle around the top of the glazed cheesecake in a circle around the edge. 
Directions:

Crust:
Preheat oven to 350 degrees.
Prepare a 9 inch springform pan by spraying generously with butter flavored non-stick spray, set aside.
Add the pecans and cookies to a food processor and process to a fine crumb.  Add almond flour, cinnamon, and Swerve sweetener and process again until well combined.
Pour into a medium bowl and add melted butter. 
Mix vigorously with a fork until it becomes well moistened and begins to clump together.  Make sure to scrape across the bottom and see to it that all dry ingredients are moistened before pouring mixture into the center of the prepared springform pan.
Press mixture from the center outward to the edge as evenly as possible by hand, then use a flat-bottomed ¼ cup measuring cup and press from the center out evenly to smooth and as you do so, press up the edge of the pan about 1 ½ inches.
Bake 10 minutes.
Remove from oven and allow to cool completely.  You can let it cool at room temperature for about 20 minutes and then place it in the freezer to finish cooling.
Reduce oven temperature to 325 degrees.
Set cooled crust aside.  It’s ready for the filling.

Filling:
Combine all ingredients except eggs into the bowl of a stand mixer.  Hand mix together with a spoon, then mix on medium speed until smooth, stopping the mixer several times to scrape down the bottom and sides of the bowl. 
Add the eggs one at a time, beating to incorporate after each addition. 
Remove mixing bowl from mixer base and scrape sides and bottom of bowl, then give the filling a stir with the spoon for a minute.

Place filling into cooled crust and gently spread surface smooth and even.  Leaving the pan on the surface of countertop, gently spin back and fourth side to side to bring air bubbles to the surface.  Pop air bubbles with a toothpick.

To use a water bath method that does not leak into pan and ruin crust, place a crock pot liner on countertop, spread open.  Put springform pan in center and pull liner up to just beneath the turned down upper edge of the pan.  Pull excess to one side and twist to tighter, secure with a twisty tie.  Then sit lined pan in center of aluminum foil sheet and turn up all the way around, to the top edge of the pan.  Use the heavy duty size foil, as it is wide enough to use only one sheet, thereby preventing leaks.

Bake for about 45 minutes to an hour (all ovens vary), until slightly jiggly in the center and lightly browned on the top.  Turn oven off and wait 12 minutes, then crack oven door open and allow to cool in oven an additional 20 minutes.  Remove pan from water bath, remove foil and liner and place on wire rack to cool to room temperature.  Loosely cover the cheesecake, not allowing anything to touch the surface, and refrigerate for at least 4 hours or overnight. 

If using optional toppings, once cheesecake is cooled completely to room temperature, before placing in refrigerator, prepare toppings and apply.  Then refrigerate the minimum 4 hours before serving.

Carb Count:

Entire cheesecake, no toppings:  68 net carbs, which equals 8.5 carbs per serving if cut into 8 servings, and 6.8 if cut into 10 servings.
Entire cheesecake, with toppings:  88 net carbs, which equals 11 carbs per serving if cut into 8 servings, and 8.8 if cut into 10 servings.


Monday, December 30, 2019

The Tamale Ladies!


What a fun experience!  I've always wanted to learn how to make tamales, and I was so excited and looking forward to great friends coming over to teach me how to make them "the right way".

It took five of us about 5 hours to make almost 12 dozen of them. Half beef, half pork, and all delicious!
The tamale makers came prepared.  They came with the two meats already cooked and chopped, and all the necessary equipment I didn't have.  That included a few beautiful clay bowls that have been in their family for generations, 2 large steamer pots, lots of ingredients, and one magic spoon!!

I'm going to summarize the steps here with no promise that I've remembered everything!  Warning: don't attempt to make these by using what I have documented here!  I'm smiling as I say that.... my goal here is just to share some of what went on.  There's no way I could actually instruct anyone how to make tamales at this point.  But one of these days..... maybe!!!

The beautiful bowls, which were used to cook the meat and spices together on the cooktop.


To begin this process, since the meat was already cooked, which saved us time, the next step was to prepare the corn husks and dried chiles by soaking them in warm water to soften.  The corn husks needed to soak for about 2 hours, so I started this process before the Tamale Ladies arrived!


These are the chiles that were also soaked to soften.


While that was happening, one person began mixing masa, baking powder, salt, and lard to make the dough that's spread onto the corn husks by adding water gradually until it reached the perfect consistency.  These ladies don't measure anything, they've been making tamales for decades, so observation was key here!!  It's a good thing I took plenty of pictures to refer back to, and it's a good thing they're going to write the directions down for me.  There's NO WAY I could possibly remember all this stuff!!


While the masa mixture was being made, the ingredients that flavor the meats had to be prepared also.  Into the beautiful bowls went some vegetable oil and some garlic, cloves, and black peppercorns. The spices and garlic were added to the bowl after they were crushed and blended together.  The spice mixture simmered for a few minutes before the cooked meat was added to the bowl, then the meat simmered for a few minutes before the softened chiles were placed in the blender with some warm water and pulverized into liquid form.  They were then added to the meat mixture by pressing through a strainer to prevent the skins from going into the meat mixture.  That's all that was done to the meats.  After that, they were just simmered and stirred every now and then.  

Crushing the spices.

Blending the spices.

 The vegetable oil in the bowl to which the spice mixture was added.

Adding the cooked meat to the spice mixture in the bowl. I forgot to take a picture of the chiles being added, but that's what happened next. 


The chiles about to be blended and liquified with warm water, then added to the meat mixture.

 Everyone is busy here! Spreading the masa mixture onto the corn husks and then adding the meat mixture, rolling them up, and placing them into one of the big steamer pots. This is a group effort!

This may look simple, but it takes practice to get the dough mixture onto that corn husk smoothly and evenly!


Water is added to the bottom of the pot, then a rack is placed over it and then the pot is filled with tamales.  

Once the pot is full, corn husks are placed over the top to help retain moisture.

Over the corn husks, a plastic bag is placed - another way to keep the steam in. 

The tamales steamed for about an hour and 45 minutes before checking them for doneness.

After they were all finished, they were removed from the pot and placed into big containers to cool before packaging them up.  They freeze well.  We kept some out to enjoy and froze the rest.

People who make tamales have their own way of doing it, and there are many ways, with different meats and ingredients.  The Tamale Ladies showed me how their family has always done it, and I enjoyed every minute of watching, helping when possible, and listening to them talk about their family tamale stories.

This was a really fun day.  Not only did I learn plenty about how tamales are made, but I also had a great time with some lovely ladies and I have lots of utterly delicious tamales to enjoy!  Lucky me!!!

Monday, December 23, 2019

Festive Maple Shortbread Cookies


I really love shortbread cookies.  I've always baked traditional Scottish shortbread until recently.  I purchased a new shortbread pan from KAF (King Arthur Flour), and decided to take a look at their recipes while I was at it.  I found this recipe for Maple Shortbread that looked really good.  It called for a few ingredients I didn't have on hand, but not to worry.... KAF had them available for purchase, so I got everything I needed right there.

Here's the pan, a snowflake pattern.


I was so excited when the package arrived, I made them right away.  I did alter the recipe just a bit to suit my own preferences, but made only very minor changes.  I was really pleased with everything about the cookies.  The texture was perfect and the flavor was excellent!

Here mine are, which I cut with a pizza wheel as soon as I turned them out.  Then I brushed them with the syrup and sprinkled the sanding sugar on them.


Here's how I did it, just in case you'd like to give them a try:

Maple Shortbread Cookies                Adapted from King Arthur Flour December 2019

Ingredients
  • 1 cup butter, at room temperature
  • 3/4 cup pure maple sugar
  • 1/2 teaspoon salt
  • 1/4 teaspoon maple flavor, optional, for enhanced flavor
  • 1/4 teaspoon vanilla-butternut flavor, optional, for enhanced flavor
  • 2 1/2 cups All-purpose flour
  • 1 cup chopped pecans or walnuts, optional
Topping
  • scant 2 tablespoons maple syrup  ** see notes below**

Instructions
  1. Preheat the oven to 325°F. Melt a tablespoon of butter and brush it onto the bottom and sides of a shortbread pan. Alternatively rub soft butter onto the bottom and sides of an 8" round pan.
  2. Beat together the remaining 15 tablespoons butter, maple sugar, salt, and flavors until well blended.
  3. Mix in the flour to form a smooth, cohesive dough. The dough will be crumbly at first, but will come together as it's mixed.
  4. Fold in the chopped nuts if using.
  5. Divide the dough in half. Wrap one half in plastic and set aside. Press the second half into the prepared pan.
  6. Use a fork to prick the dough all over; this allows any steam to escape, and prevents the shortbread from bubbling as it bakes.
  7. Bake the shortbread for 25 to 30 minutes, until the surface is a light golden brown, and the edges are a darker golden brown.
  8. Remove the shortbread from the oven, and immediately turn it out onto a clean work surface. Gently brush the shortbread with the maple syrup (you want to be careful not to brush away the pattern if you used a shortbread pan).
  9. Using a pizza wheel or sharp knife, cut the shortbread while still warm into 8 equal wedges and transfer them to a rack to cool completely.
  10. Repeat the bake with the remaining half of dough.
  11. Store the shortbread, well wrapped, at room temperature for several days; freeze for longer storage.
**Notes**
The shortbread released from the pan perfectly and as you can see in my picture, the pattern was well defined.  I was a little concerned about what brushing them with maple syrup would do to the texture of the cookie, but once the cookies cooled, there was no difference.  I chose to omit the nuts and I also decided to sprinkle mine with white sanding sugar right after brushing them with the syrup.
I found that the scant two tablespoons of maple syrup was not quite enough.  I suggest using a soft bristled or silicone brush to apply the syrup, and not a stiffer type bristled brush.
Lastly, it isn't necessary to have a shortbread pan.  You can use a round pan, pie plate, or even a sheet pan.  I have baked my Scottish shortbread in all of those options with no problems.

I you like maple flavor and shortbread, you will love these cookies.  I think I have a new Christmas cookie tradition here!

Wednesday, December 11, 2019

"The Learning Cookies"

Well, actually, they're Christmas cookies, but for me it was a learning experience.  I've been wanting to learn how to decorate cut-out cookies with royal icing for years.  This year, I finally decided it's never going to happen if I don't just jump into it and give it a go.

I watched YT videos until three a.m.
I visited a gazillion cookie-making websites and cookie blogger posts.
I watched all the YT videos AGAIN.....
I wondered if it would actually be possible.
I eventually found myself ordering supplies from Amazon.
I went to Hobby Lobby to see what else I should probably have.
I decided to actually bake the cookies and hoped they would not only taste great, but hold their shape so I wouldn't have to start all over with a different recipe.

The above list could go on and on.... but I'll spare you!  In the end, it took me a few hours to make the cookie dough, chill it, cut the cookies out, chill them again and bake them.  I survived that part, at least.  They were quite flavorful and retained their shape.

Now.... for the dreaded royal icing challenge!  It's what I have feared the most.  So many different ways it needs to be prepared, depending on what exactly you want to do with it.  There's stiff consistency, medium, outline, and flood consistency.  And they need to be just right for the best results.  So much to learn!

Then, there's the questions brought to mind when trying to decide which "best" is really the best one.
Every video, every website, every blog post.... they all have the "best" way of doing things.

Oh my.

Well, this was my first attempt at trying to learn how royal icing behaves and trying to get the consistency right.

I know this much:
I need to take lessons.
I need to learn how to make decorated cookies happen in a more organized fashion.  My normally sparkling kitchen looked like a tornado passed right through the center of it by the time I finished.

I'm not entirely unhappy, I did learn a few things, but mostly, I learned I have plenty more to learn.
Oh..... and I learned that I think I'm going to enjoy it!

Thursday, September 19, 2019

Crispy Seasoned Tortilla Strips


These crispy, zingy little bits of goodness are a perfect combination of ingredients that will enhance the flavor of and add great texture to soups or salads.
I made these today to use as a topping for taco soup.  I like to put a generous amount of grated cheese over the top of my soup and then add these crispy tortilla strips before I dig into it!

They are so much more flavorful than the store-bought variety and aren’t hard to make.  Give them a try the next time you make something they would go well with!


Ingredients:


4              soft taco size Mission flour tortillas

2              teaspoons taco seasoning mix

1              generous dash Worcestershire sauce

1              dash Frank’s Hot Wings Buffalo sauce (about a half teaspoon, or to taste)

½             teaspoon salt, plus extra

¼             cup olive oil


Directions:


Combine liquid ingredients (olive oil, worcestershire, buffalo sauce) in a bowl and whisk together.


Combine and mix together taco seasoning and ½ teaspoon salt in a separate small bowl and then add to olive oil mixture and whisk.  Set aside.


Preheat oven to 375 degrees.


Prepare tortillas by cutting into narrow strips and then cutting the strips into whatever lengths you want individual pieces to be.  Shorter ones are better for soups, but you can make them any length you wish.  I used a pastry wheel to cut mine with.


Place the strips into a gallon size zip lock bag and then whisk the liquids one more time before pouring into the bag over the strips.  Seal the bag and gently move the bag around until all the strips are coated with the liquid spice mixture.  You can add a little more olive oil to the bag if necessary, but I have never had to do that.


Dump the bag of strips onto a sheet pan and spread them out evenly, as single-layered as possible.

Bake for 5 minutes. Remove from oven and gently toss and move around in pan using a spatula.

Return to oven and bake an additional 4 to 5 or so minutes.  Repeat this process until the strips are baked to the degree of crispiness you prefer.  I baked and turned mine three times, twice as described above, then the last time, I turned to oven to the low broil setting (leaving the pan on the center rack) and broiled them for about 2 minutes just to get them as crispy as I wanted them to be.


Immediately after removing from oven, sprinkle with a little more salt.  Use a spatula to remove them from the sheet pan onto a layer of dry paper towels to cool completely. 


This recipe can easily be doubled, and you can store any leftovers in a plastic container or zip lock bag and keep at room temperature. 
You can also adjust the ingredients, such as the buffalo sauce, to suit your taste.  Don't be afraid to use different seasonings!  I use many different combinations... Hidden Valley Spicy Ranch Dip & Dressing dry mix, or Italian dressing dry mix with garlic powder and dried Italian seasonings are both great combinations for salads.  Just mix them with the olive oil instead of the ingredients listed here.
For a sweet snack, toss them in melted butter and then add a cinnamon/sugar coating to the bag.  They're so good!!!


Monday, September 2, 2019

Easy Breakfast Quiche for Two

I made breakfast in a well seasoned 7 inch cast iron skillet this morning! It's the perfect size for two servings.


Here are the ingredients I used:

4 eggs
Crumbled fully cooked breakfast sausage
Diced Canadian bacon
Shredded cheese
Heavy whipping cream
Whole milk
Salt, pepper
Paprika
and some Frank's Buffalo Wings Sauce!


Whisk the eggs... I'm using a 4 cup measure to combine all the ingredients in.
Next, add salt & pepper, about 1/2 cup of heavy cream, and 1/4 cup whole milk, and the Frank's, which is optional.  I used a tablespoon.


Add all the remaining ingredients except the paprika.  I don't measure any of them, but it's about 3/4 cup of shredded cheese, 2 sausage patties, 3 slices of Canadian bacon, and about 1/4 cup real bacon bits. 


I sprayed the skillet generously with butter flavored non-stick cooking spray.


Poured the filling in.... you have a pile of the solid ingredients in the middle after you pour them in.


Just use your whisk or a fork to spread them evenly into the liquid, then sprinkle the top with additional black pepper and paprika.


Bake at 350 degrees until the center is not sunken and there is only the slightest jiggle when you shake the skillet.  It took about 25 minutes for mine, but oven temps vary, so keep an eye on it as it bakes. 


And here it is.... a hot, delicious breakfast that's not hard to make!


Saturday, August 31, 2019

Crispy Low Carb Tortilla Thin Crust Pizza


Yippee!  I finally figured out how to make a crispy thin pizza crust that's low carb! It's not cauliflower, it's not floppy, and - most importantly, it tastes good!!

I went with a four meats version, but if you make this, use your favorite toppings.

To begin, I mixed all the meats together in a bowl.  I chose crispy bacon, browned crumbled sausage, Canadian bacon, and mini pepperoni.  Then I set it aside and went to the next step.

All mixed up!!

Next, I combined about 1/4 cup olive oil, 1/2 teaspoon Italian Seasoning, 1/2 teaspoon garlic powder, 1/4 teaspoon paprika, freshly ground black pepper and coarse ground salt into a small bowl and whisked it together well.

The paprika was just to add color, it's optional!
I decided to do this 2 pizzas at a time, so I used 2 ten inch cast iron skillets.  Brush one side of a tortilla with the olive oil mixture using a pastry brush.  Place it brushed side down into the skillet with the burner set to medium.  Allow the tortilla to brown on the bottom, then remove the skillet from the heat and flip the tortilla over in the skillet.  The sauce and toppings will be added to the side that has browned, keeping the tortilla in the skillet.

After brushing with olive oil mixture

I'm doing 2 at a time, one in each skillet. Both will go into the oven at the same time later...


Browned side brushed with olive oil mixture flipped, ready to add toppings.  

Remove the skillet to a hot pad or trivet to add sauce and toppings.

Pizza sauce spread over surface...

Next, shredded pizza blend cheese...

Then meat toppings and more cheese....

Into the oven on the middle rack to broil on high setting....

I used a convection broil to do this, but a regular oven broil will work just fine.  Watch to make sure you don't burn it.

Remove from oven and use a large spatula to place pizza on a wire rack for about 2 minutes to prevent moisture from softening the crispy crust...
I used Mission brand Carb Balance flour tortillas.  Each tortilla is 6 net carbs. I used Classico Traditional Pizza sauce.

Ready to slice and enjoy!!

I made 4 little pizzas.  The tortillas are the perfect size for a small, single pizza for one. Depending on how many you wish to make, just approximate the volume when it comes to preparing the toppings.  We like it pretty heavily loaded, as you can see in the picture above.  Even with that much topping, the crust held up very nicely and didn't flop.  

I know there are different brands of low carb tortillas available, but they are thinner, and I felt the Mission flour tortillas would hold up much better.  I don't think you would get the same great results with any other kind.

If you love thick crust pizza this isn't for you, but if you like pizza with a thin, crispy crust, it's a great option and also  anyone on a low carb or pre-diabetic diet can enjoy it!