Monday, January 30, 2017

I Finally Did It !!!!

What, exactly is it that I finally did, you may ask....  well, I'll tell you!  I have mastered the art of making my own beautiful wooden spoons!  Back in July of 2015, when I was just starting my blog, I wrote about all my beloved wooden spoons, and about how I wanted to make my own someday.


Here they are, my first three spoons!!

I've wanted to work with wood for years now, and I found a place close enough to my home that offered classes, so I took basic woodturning and a cutting board class and totally fell in love with all of it.  I proceeded to buy a nice middle sized lathe and some basic woodturning tools, and along the way have been trying to get all the tools I think I need to get started on some projects into my shop.  I still need a good band saw, a planer, and maybe a drum sander, and I think I'll be happy for now.

Anyway... there was also a wooden spoon class that was scheduled I was hoping to take, but it was cancelled, and after I thought about it, I decided it wasn't the way I wanted to go with my spoons anyway.  They were making them by using a jig on the lathe and doing spindle work on the handles first, then using the jig to secure the spoon in a different way so you could gouge out the business end of the spoon with a bowl gouge.  It works fine... I saw pictures of some of the spoons.  They were beautiful, but too perfect.  I don't want perfect!  I can go anywhere and buy a perfect wooden spoon.  I have LOTS of them already.  I want my spoons to be handmade, not machine made.  I want them to look somewhat rustic and like they've been around a while.  So, in the end, I decided that class wasn't really what I wanted. 

That's when my brain went into the "how am I going to make it happen now" mode.  I figured it couldn't hurt to just use my common sense, apply the basic knowledge I already have, and be brave enough to try.  The worst that could happen is some big disappointments and wasted wood and time.
I went for it.

At a local woodwork supply store, I found some beautiful Ambrosia Maple and Cherry that I thought would make strong, beautiful spoons.  I took it home and used some of my own wooden spoons as templates, the ones I love the shape of and look of the most.  

I cut them out with my scroll saw since I don't have a band saw yet.  After that, it was lots of hand work.  LOTS!!! My hands have never been so tired.  I had 7 cut out ready to finish, but I could only get three of them done before I was done in. 
They are all made out of Ambrosia Maple.  The small one is 6 3/4 inches long, the medium one is 9 inches long, and the big one is 11 1/2 inches long.  I was really pleased with how they came out, and I'm relieved to know I can actually do this without someone teaching me.  I can only get better at it as time goes by.  These have already sold.  I have wood to make about 18 to 20 more, which is exactly what I'm going to do as soon as I have time to get them done, because I need some for ME!  I also want to use some of the scrap wood to make some spreaders... for jams, butter, soft cheeses.  That will be another challenge.  I don't know if I can do that or not, but I'm determined to try!

The problem with all this is... it's all I'm thinking about right now.... it's all I want to do!  But I have other things that demand my attention and I can't do this 24 / 7 like I wish I could!
Balance... it's all about balancing things out.  I can do it, I can.... I can....

Sunday, January 22, 2017

Skillet Apple Pie Biscuits

I'm on a cast iron skillet cooking kick!  Here's a recipe I found that looked like something my husband would really like, so I decided to give it a go.  It looks so good, I just couldn't see how it could possibly not be!

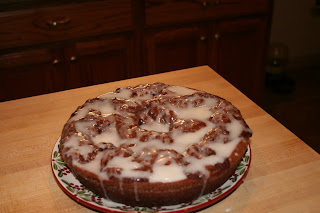
Here it is, right out of the oven, laughing at the two ding-a-lings standing over it, fork in hand, drooling and waiting for it to cool enough so they don't burn their mouths...

To get started, I melted a stick of butter and mixed brown sugar, cinnamon, & nutmeg together in separate containers.

Then I brushed some of the melted butter all around the bottom and sides of my 10 inch skillet.

I went with these biscuits, but I think any type/brand would work just as well.

It's important to get premium pie filling, it has much less liquid in it, more apples.


I put the pie filling into a bowl and cut it up into smaller pieces.

Then dipped each biscuit into the butter to coat the entire surface - this is a messy step, but it's kinda fun.

Then I sprinkled some of the brown sugar mixture on the top and sides of each biscuit before putting into the skillet.

Next, I arranged the apples over the top of the biscuits,

Poured the remaining melted butter over the apples,

Sprinkled the remaining  brown sugar mixture over the top, and baked.

While it was baking I made the simple glaze that goes on after it comes out of the oven.

Done!!

I drizzled the glaze on immediately after removing it from the oven.

I asked my husband to rate it, between 1 - 5 stars.  He gave it a 4.5.  Why? He said he'd like it better if the biscuits weren't so big and "biscuity".  Sooo.... next time I make it, I'll quarter the biscuits instead of placing them in the skillet whole and I think that will solve the problem.

Here's what I did differently:  I used canned biscuits,  I didn't use the optional nuts, I added a little cinnamon to my glaze, and used heavy cream instead of half & half or milk as called for to make the glaze.  I don't think it would be necessary to double the glaze recipe, but I guess if you're really big on the glaze part, it could make you happy!

Here's the original recipe, which comes from Melissa Sperka at melissassouthernkitchen.com

Skillet Apple Pie Biscuits
Author: Melissa Sperka
Serves: 8


Ingredients

·         8 frozen buttermilk biscuits, thawed or homemade buttermilk biscuits
·         1 [21 oz.] can premium apple pie filling
·         1 stick [1/2 cup] butter, melted
·         ½ cup light brown sugar
·         1 Tbsp ground cinnamon
·         1 tsp pure vanilla extract
·         ⅛ tsp nutmeg
·         ¼ cup walnut or pecan pieces [optional]

·         Glaze: [double if desired]
·         ½ cup powdered sugar
·         2-3 Tbsp cream or half & half or 1-2 tsp whole milk

Instructions

1.     Preheat the oven to 375°F. Melt the butter, and brush on all sides of a 10-inch cast iron skillet.
2.     In a bowl, mix together the brown sugar, cinnamon and nutmeg until blended.
3.     Dip each biscuit in the butter, and sprinkle all sides with the cinnamon sugar mixture. Arrange side by side in the skillet.
4.     Cut the apples in the pie filling into smaller pieces, and mix in 1 teaspoon of pure vanilla. Arrange over the biscuits.
5.     Pour the remaining butter over all and sprinkle the remaining cinnamon-sugar on top.
6.     Bake for 30-35 minutes, until golden and puffy.
7.     Mix together the ingredients for the glaze. Drizzle on top.
8.     Serve hot.


Friday, January 20, 2017

Yellow Squash Frittata with Beef & Onions

I'm crazy about frittatas!  Once you figure out the basics for making one, you don't need a recipe, you can just throw one together with whatever you have on hand.  I had some tender little yellow squash to work with today, and I love squash and eggs together. 

Here it is, just waiting for me to cut into it!


The Step by Step:
One medium onion, into the skillet which had a couple of tablespoons of olive oil in it. 


Once the onions were getting some good color on them, I added the diced up yellow squash and just a little more olive oil.


Then I added salt & pepper and cooked over medium heat until the squash was tender.

This is the end result, so I just set this to the side while I moved on to cooking the meat.

I browned a little over half a pound of lean ground beef with salt, pepper, and a few dashes of Worcestershire sauce until it had some nice color on it, little crunchy bits here and there...removed it from the skillet and set it aside.

I combined 5 large eggs, 1 cup of heavy whipping cream, and 1/2 cup milk and whisked it together well.


Next, I added about a cup of grated cheese, salt & pepper, and some garlic powder and Italian seasoning.


I coated my 10 inch cast iron skillet with olive oil (this isn't the same skillet I cooked the onions, squash, and meat in), and, after mixing the veggies and meat together, poured them into the skillet and spread evenly.

With the burner on medium high heat, I poured the egg/milk mixture over the top.

Then I sprinkled it with a little more salt and pepper and some smoky paprika.  It may seem like I'm over-salting this, but I'm not.  This dish needs salt at every stage of cooking.  I cooked this until the edges just began to puff ever so slightly and started to appear drier. Then, I moved it to the oven to finish cooking.

After 10 minutes of baking in a preheated 400 degree oven, I sprinkled a mixture of grated pepper jack and Colby jack cheeses all around the outer edge and returned it to the oven.  I lowered the temp to 350 and baked an additional 8 - 10 minutes, until the edges were nice and puffy and the center was set, with minimal "jiggle".


After allowing it cool in the skillet for about 5 minutes....

it was time to eat!


This was baked in a 10 inch skillet.  I'd say we did a pretty good job of almost polishing the whole thing off, considering there are only 2 of us!  We both salted it again on our plates after tasting.  It just needed a little more salt, but it was mighty good!

The options for what to throw into a frittata are practically endless.  The trick to a good frittata is to get a good liquid to solids ratio so it cooks evenly and the center sets before the bottom overcooks.  The egg part will become rubbery and unappetizing if it cooks for too long.

Monday, January 16, 2017

Quickie Veggie Soup


Sometimes I don't have everything I need to cook what I want.  This was one of those times.
Normally, this soup would be loaded with nice fresh veggies, but not today.
Today, I want soup and I want it now.  I'm NOT going to the store.
Here's what I came up with, and it went together very quickly, but more importantly, it's good!


Here's what I used:

1 bag frozen mixed veggies
1 medium onion, diced
1 can tomato sauce
1 can organic fire roasted diced tomatoes
2 packets of Lipton Beefy Onion soup mix
1 large container of 33% less sodium chicken broth (could have used beef, didn't have / didn't matter)
2 tablespoons dried parsley flakes
1/2 teaspoon garlic powder
1/2 teaspoon Italian herb
3 dashes Worcestershire sauce
Salt & pepper


I put a little olive oil, maybe 2 tablespoons, into the bottom of my soup pot and added the onion and frozen veggies in and cooked them on medium heat until they were defrosted and the onion was softened a bit.

Then I added all the spices and the Worcestershire, stirred it up, added the can of tomatoes, the soup mix, the tomato sauce, and the broth and brought it to a boil.  I then reduced it to a low simmer and allowed it to cook, uncovered, for about 45 minutes.  You can just cook it until the veggies get to the point of tenderness you prefer.

It was quick and easy, and it's making me happy today, served with a slice of fresh homemade bread.
I love raiding the pantry and freezer to see what I can come up with to throw a quick meal together!

Sunday, January 15, 2017

Scratch Cinnamon Roll Cake


Cinnamon Roll Cake, how can that be bad?  I've loved cinnamon since my early childhood.  I think the first time I ever had it was probably by way of ooey-gooey oven broiled cinnamon toast my mother made. Just plain old white bread with lots of soft butter slathered on, then topped with cinnamon and granulated sugar.  She always got it out of the oven just when the edges were beginning to toast and the middle was still soft.... right when the sugar and cinnamon got all bubbly and mixed together and became a little crusty on top, but not toasted.  Then she would take it out and flip it over for a minute to let the steam rise off the back side before giving it to us.  Loved it then, love it now!
Anyway.. I sort of went sideways there... back to center.. the Cinnamon Roll Cake! You can find the original recipe at the bottom of the post!
Credit where credit is due!  Thank you Anna.  Anna's blog can be found at
crunchycreamysweet.com
This is her recipe, not mine.  I was just fortunate enough to happen upon it!
I, as always, adapted it to my own liking. I didn't use unsalted butter, baked it in an iron skillet, and  used a different method of coating my skillet.

Oh my goodness gracious sakes alive!!!

Here's the stuff for the batter.  Just the batter!  There are three things to prepare here. The batter, the cinnamon filling (the best part, by far), and the glaze.

I'm going with my large skillet, but the original recipe called for a 9x13 baking dish.  I sprayed it generously with non-stick cooking spray.

Next, I mixed 1 teaspoon of cinnamon and 1/3 cup sugar, mixing it well...

and poured it right into the center of the prepared skillet.

Then just swirled it around until the entire sides and bottom were completely coated.  This way of coating the pan involves no flour, but I have never had a cake of any kind stick to the pan when I use it.  It makes for a most delightful outer crust!

Next, into a large mixing bowl, add the sugar, salt, and baking powder, then sift the flour into it.


Whisk to mix all the dry ingredients well.

Now for the wet ingredients, combine the milk, eggs, and vanilla.


Whisk until smooth,

then add the melted butter, half at a time,

Whisk again until smooth (lots of whisking here!)  Then add the wet ingredients to the dry and whisk until smooth. This makes a thick batter.

And pour into the prepared skillet and set aside.  It's time to get to work on what has to be the best part!

For the filling, beat 2 sticks of room temperature softened butter until smooth,

add brown sugar, cinnamon, and flour...

mix well with a spoon,

and then use an electric mixer and beat about 2 minutes until smooth.

Dollop the filling onto the top of the batter by the spoonful about an inch or so away from the edge.


Gently spread it out with a butter knife or spatula.

Swirl it into circles using a butter knife. Put it in a preheated 350 degree oven.  If I were making this in a 9x13 baking dish, it would only need to bake for about 28 to 32 minutes, but since I'm using my iron skillet, the batter is much deeper and will take longer to bake.  This may or may not work out for me, but I was determined to skillet bake this thing, and this is the largest one I have!

While it bakes, I've moved on to the glaze.

Easy, simple... confectioners sugar, vanilla, milk.

All smooth and ready to go.  Now back to the cake...


It released from the skillet beautifully. I turned it out about 3 minutes after I removed it from the oven.

On with the glaze!  ALL of the glaze!

Beautiful.  The center of the cake had a nice gooey center of cinnamon goodness, but the cake layer beneath it was fully cooked. 

After letting it cool for about 5 minutes, my husband couldn't wait any longer. "CUT THAT THING"

And so, here it is. 


Next time I bake this, I will still go with the skillet method because I love the way it bakes, but I need to go get the next size up so I can reduce the baking time.  Yay, how can I possibly have too many iron skillets?  I can't!!  The cake was still moist and delish, but would have been even better if the batter wasn't quite so deep in the pan, with a shorter baking time. 

Cinnamon Roll Cake From Scratch
Ingredients / Cake:
·         3 c all-purpose flour sifted
·         1/4 tsp salt
·         1 c granulated sugar
·         4 tsp baking powder
·         1 c and 1/2 milk
·         2 large eggs
·         2 tsp vanilla extract
·         1/2 c unsalted butter melted, 1 stick
Cinnamon Filling:
·         1 c unsalted butter softened to room temperature, 2 sticks
·         1 c packed light brown sugar
·         2 Tbsp all-purpose flour
·         1 Tbsp ground cinnamon
Glaze:
·         2 c powdered sugar sifted
·         5 Tbsp milk
·         1 teaspoon vanilla extract
Instructions:
1.     Grease a 9"x13" cake pan. Set aside.
2.     Preheat the oven to 350 degrees F.
3.     In a large mixing bowl, whisk together flour, salt, sugar and baking powder.
4.     Add milk, eggs and vanilla and whisk until smooth.
5.     Slowly add the melted butter and whisk until everything is smooth.
6.     Spread the batter in the prepared pan. Set aside.
7.     In a medium mixing bowl, beat butter with electric mixer until creamy.
8.     Add sugar, flour and cinnamon and beat until fluffy, about 2 minutes. (It will look crumbly at first but keep beating, it will come together.)
9.     Spread the filling over the cake batter, leaving at least 1 inch of space from the edge of the pan. Swirl gently with a off-set icing spatula or a rubber spatula.
10. Bake the cake for 28 to 32 minutes or until the toothpick inserted in the cake part comes out clean.
11. Cool the cake for 15 minutes. Pour the glaze over the cake and spread evenly.
Glaze:
1.     Sift the powdered sugar over a medium mixing bowl.
2.     Add vanilla and milk and whisk together until smooth and drizzling consistency. Spread over still warm cake.   Keeps covered in room temperature for up to 3 days.