Monday, August 31, 2015

Pecan Pie Cheesecake Squares

I know it's a little early, but I'm already in the Fall baking mode! Here's a new recipe I've just finished that will be great for the upcoming Fall months.  I've been having fun with the Great San Saba River Pecan Company products, and this is another example of what you can do with one of them. 

Lookie... it's loaded with pecans!
 
 
Here's the "How To":
 
First up, prepare the baking dish.  Generously spray a 9 x 13 with non-stick cooking spray. 
 
Now, for the crust layer. Combine the following 3 ingredients into a medium bowl and work together with a fork until all the crumbs are moistened, then press the crumb mixture into the bottom of the prepared baking dish and up the sides just a bit all the way around.
 
2 cups graham cracker crumbs
1 stick melted butter
1/2 teaspoon cinnamon
 
 Tah-dah!  Done with that part. Easy... and no need to prebake it... just set it aside for the moment!  Is there some official way to spell "Tah-dah"?  Hope I didn't get it wrong.  It might be "Ta-da" or "Tuh-dah", or even some no-dash variation.... anyway.... back to the recipe.
 
Time to make a mixture with the Pecan-Pie-In-A-Jar! 
Ingredients for this mixture:
 
1 jar of Pecan Pie In A Jar (1 lb. 13 oz.)
3 large eggs
2 tablespoons butter
1 teaspoon cinnamon
 
Whisk the eggs well, until there is no separation of whites and yolks.
Pour the entire jar of that pecan pie stuff, along with the whisked eggs, into a heavy-bottomed medium sauce pan and stir together until well incorporated before you turn on the heat.  Add the butter and cinnamon, then turn on the heat to medium high, stirring constantly, until it begins to bubble.  Turn heat down to medium, and continue cooking and stirring constantly until it thickens.  You want the level of thickness to be beyond what will pour off the spoon.  It should "plop" off the spoon.  It takes about 15 minutes or so. When you get it to the plop stage (I'm pretty sure that's not an actual culinary term used to describe the readiness of anything), remove from the heat and set aside, allow to cool.
 
It's time now to preheat the oven to 350 degrees!
 
There's one more mixture to put together... the cream cheese mixture.  Here's what you need:
 
2 bricks (8 oz.) softened (room temperature) cream cheese
2 eggs
1/4 cup sugar
1 teaspoon vanilla
 
Beat the cream cheese and sugar together at medium speed until smooth.  Whisk the eggs and vanilla together in a separate bowl, then add to cream cheese and beat again until smooth.  Scrape sides and bottom of the bowl just to make sure it's all well mixed. 
 
Add cooled pecan pie mixture (it's ok if it's warm, you just don't want it to be hot), to the cream cheese mixture, and beat by hand until well mixed.   


Then, as seen above, spoon onto, then gently spread evenly over the entire crust layer.
 

Bake until set, which should be around 35 to 40 minutes, depending on your oven.  There will still be a slight jiggle, especially in the center. 
 
Remove from oven and allow to cool to room temperature before refrigerating for at least 4 hours before cutting into squares.  Keep refrigerated.


Here's how they should look.  Don't be surprised if you get some uneven edges when you cut, because the knife will be running into pecan halves, but who cares, right?  There's one sure fire method for getting rid of the ones you don't feel are perfectly cut enough.  Eat them, quick, before anybody discovers some of them weren't perfect.  Works every time for me.....


Thursday, August 27, 2015

San Saba Lemon & Raspberry Pecan Blondies


Oh my goodness!  I've been having fun in the kitchen developing recipes for some of my favorite products.  I recently made a cheesecake with The Great San Saba River Pecan Company Peach Pecan Amaretto preserves.  Well... just so happens, they also have a Raspberry Pecan preserve, so I just couldn't leave that alone. 

These blondies have a substantial enough bottom layer to support the soft, gooey top layer!

I started by pre-heating the oven to 350 degrees and preparing a 9 x 13 glass baking dish by spraying it generously with non-stick cooking spray.

Here's the ingredient list:

1  18.25 oz. box Duncan Hines Lemon Supreme cake mix
3  eggs, at room temperature (divided use)
1/2  stick melted butter
1  tablespoon water
1  tablespoon lemon juice
1  11 oz. jar Raspberry Pecan Preserves  (divided use)
1/2 cup chopped pecans (I used cinnamon coated but plain is fine)
1  14 oz. can sweetened condensed milk
1  teaspoon vanilla

Combine the cake mix, 1 egg, melted butter, water, and lemon juice in a large bowl.  Use a pastry cutter or fork to break the egg up and get most of the cake mix moistened, then just get in there with your clean hands and continue mixing until you can form a ball of dough.


Then press the dough mixture into the bottom and slightly up the sides of the prepared baking dish.


Bake for 15 minutes, then remove from oven, leaving the oven on at 350 degrees.  Next, place the entire jar of preserves into a small bowl and remove 1/3 cup of them and set aside (no need to whisk  or warm up). Whisk  the larger portion to loosen to a easily spreadable stage.  Depending on the temperature of your kitchen, you may need to heat the preserves.  If so, you can warm them in a saucepan over low heat or microwave them at 50 % power until just liquid enough to spread easily over the dough, but this probably won't be necessary. 
 
 
Spread the preserves over the dough and sprinkle with chopped pecans as shown.
 
 
Next, combine the condensed milk, 2 remaining eggs, and vanilla in a medium bowl and mix at medium speed until smooth.  The mixture will be thin and bubbly on top. Slowly pour it over the top of the preserves/pecan mixture.  Some of the preserves and pecans will show through. 
 
 
Next, drop spoonfuls of the preserves you set aside onto the milk mixture and then gently swirl it a bit using the tip of a butter knife.
Here's what it looks like prior to swirling!
 
Now, return it to the oven and bake for an additional 30 minutes, or until it is set.  The top should be nicely browned and it will still have a slight jiggle to it.  It will firm up as it cools!


Allow to cool completely before cutting into squares.  I chose to loosen it around the edges of the pan and remove it to my cutting board to cut into squares, but you can just cut it in the baking dish if you prefer.  Use a sharp serrated knife to cut them with for best results.


Optional:  Dust with powdered sugar after cutting.
 
These are so delish!  Now I just need a nice hot cup of coffee and it's a good start to a great day!


Thursday, August 20, 2015

Instant Gratification Salsa

Were it not for me, the tortilla chip industry might go under.  There are always bags of them in the pantry. Big bags.  If not, my husband begins to spiral downward  into his "where's my chips and salsa" panic mode, and I don't like it when that happens, so to keep his panic devils away, I just make salsa to go with his tortilla chips, and he's a happy guy. 

What used to be my emergency back-up salsa has pretty much turned into my all-the-time version just because we like it so much, and it's so easy and quick to make.  It's nothing like the old version, for canning purposes, using all fresh ingredients and spending a few hours in the kitchen getting it done.  This stuff just goes right into the fridge, where it will keep for 3 weeks, but it never lasts that long. 


I start out by grabbing 4 cans of tomato products out of the pantry.  I go with 1 mild and 1 regular can of Rotel tomatoes, and 2 cans of Muir Glen Organic Fire Roasted ones.  I really love this brand of fire roasted tomatoes in this salsa because it adds a great smoky flavor - so much better than any other brand I've used.  Next, I drain the two cans of fire roasted tomatoes until most of the liquid is out, then I dump all 4 cans of tomatoes into the food processor. I don't drain the Rotel tomatoes. 


After that, I toss in some salt (not quite a teaspoon... I use the "palm measure" method), about a  tablespoon of sugar (yes, sugar!!!), and about a tablespoon of lime juice.  Finally, I add 3/4 of a scoop of Simple Salsa and process it to the degree of smoothness I want it to be at.  All that's left to do is taste it, adjust the salt, sugar, Simple Salsa amounts if necessary, and I'm done.  I jar it up into wide mouth jars and into the fridge it goes. 


You can add anything you want to this... onions, jalapeno peppers, fresh cilantro... use all regular or even hot Rotel tomatoes... but I don't.  We just really like this smoky, slightly sweetened version.  Whatever you do, don't forget the salt!  The nice thing about making any salsa is that you can start with lesser amounts of the spices and taste your way up to eventual perfection as you increase the ingredients to your liking.  If you don't have any left to jar up by the time you're done doing that, uh.... oh well, you won't have any jars to wash, right?


I discovered Simple Salsa at a booth they had at a local garden show.  I bought 2 canisters of it, one mild, one not.  I've had to re-order via their site, which is http://simplesalsamix.com
It can be added to soups, stews, dips, steaks, chicken, fajitas... it's not just for salsa.  It's good stuff!

No panic devils are getting the best of me! 


Wednesday, August 12, 2015

No Measure Puff Pastry Pinwheels

I love easy baking, I mean, sometimes you just need easy.  Good and easy, that is.  If the end product isn't good, the "easy" is pointless.  Here's one that's good and easy!  Puff pastry pinwheel recipes have been around for a long time, and what's good about them is how versatile they are.  You can go sweet or savory.  They're the perfect appetizer size, and people really like to eat them! Well, not all people -I do have a friend that can't eat garlic and utterly detests the taste of parmesan. I can just see him now, rolling his eyes and thinking how horrible and disgusting these would be.  He certainly wouldn't like them. Sorry Neil.

Anyway, I almost always have a few packages of puff pastry in the freezer, so after looking online at lots of puff pastry recipes for something different than my usual to do, there they were - pinwheels.  I decided.... heck, I don't even need a recipe for these things.  I'll just make 'em with what's in my pantry and fridge and see what happens.  So that's what I did, and I didn't measure a darn thing.  Guess what?  They were really good. 


I raided the pantry and fridge and took these things out to use:
  • jarred spaghetti sauce
  • Italian herb seasoning
  • Garlic powder
  • Grated parmesan cheese
After rolling out the pastry sheets to a longer, thinner rectangle on a lightly floured surface,
I simply spread a thin layer of the sauce with the back of a spoon onto the pastry, then sprinkled some Italian herb seasoning and garlic powder over the sauce.  After that, I sprinkled on the parmesan cheese.  I did take care to stay about an inch away from the edge of the pastry on the long side, so I could dampen the inside edges with a little water to prevent them from pulling away as they baked.

I carefully rolled the pastry sheets up into a log and placed them on a baking sheet and stuck them in the freezer for about 15 minutes so they would cut nicely.  I wasn't particular about the exact width of each slice when I cut them, I just tried to stay at about 3/4 of an inch. I brushed the tops with a wash of 1 egg and a little water - something I always do when baking puff pastry because it gives the surface a glossed finish for a nicer presentation.   I placed them on a baking sheet sprayed with non-stick spray and baked them at 400 degrees for about 18 - 20 minutes, until they were nice and golden brown on top.

I could have heated up some of the left over sauce and used it for dipping, but I didn't think of that until it was too late.  Maybe next time.....

I'll be experimenting with pinwheels again, these were so good ... oh... and so easy!

Wednesday, August 5, 2015

Strickland Springs Skillet Peach Cake

It's the perfect time to bake with beautiful fresh peaches, or, you can use frozen or canned in this recipe if fresh ones are out of season.  I make this in my good old trusty 10 inch Lodge iron skillet. This is a very simple recipe using few ingredients.  It may be summer, but pair this warm cake up with some really good vanilla ice cream, and you won't care how hot it is outside! 
I know... the name is a little long... I could have just called it "Peach Cake", but, hey.... I decided to name it after the East Texas country oasis I will someday call home.


Here's how you make it:

Preheat your oven to 350 degrees, and then melt 1/2 stick of butter and spray your skillet with a little non-stick spray before you pour that butter into your skillet.  My skillet is well seasoned, but I do this anyway.  Don't have an iron skillet? Just use what you do have.  A baking dish of any sort will work, you want something smaller than a 9 x 13, such as a 8 x 8.   If you use a dark pan, the baking time may be shorter, so keep an eye on it, and even if you use a non-stick pan, spray it anyway with some non-stick spray.  You'll thank me when it's time to clean the pan.

Cut 5 or 6 fresh peaches into bite sized pieces and set aside. 
In a small bowl, combine 1/4 cup of sugar, 1/2 teaspoon cinnamon, and 1/2 cup chopped pecans and set aside.

Now, into a medium bowl, put:

1  cup all-purpose flour
3/4  cup sugar
1 teaspoon baking powder
1/8 teaspoon salt (if using unsalted butter, add 1/4 teaspoon salt)
1 teaspoon cinnamon

Whisk all that together, then pour in 2/3 cup of whole milk and whisk just until well mixed.

Pour the batter into the skillet, directly over the melted butter.  Drop the peaches into the batter.  I do this by hand, picking the peaches up and covering the entire surface of the batter with them.  Use a spoon if you don't want to do it my way!  Don't stir... the batter will rise up slightly around the fruit.
Bake for 20 minutes, then remove from the oven and sprinkle the cinnamon, sugar, pecan mixture all over the top and return to the oven for another 15 to 20 minutes, depending on your oven. 

When you see nice browning all around the edge and the batter has risen in the center, it's done.  You should be able to see nice bubbles happening throughout it.  Remove from the oven and allow to sit at room temperature for about 20 minutes before serving.  Next time I make this, I think I will add about a half cup of good peach butter to the batter, just for extra flavor.

You can always use other fillings with this recipe if you want - apples or berries would be good, to name a few, and you can also double it and bake in a 9 x 13.  Now, excuse me... but I've gotta go see if there's any vanilla ice cream in my freezer!!!

Thursday, July 30, 2015

Peach Pecan Amaretto Cheesecake


Delish!  I had some concerns about this one when I was developing the recipe.  I've never made a cheesecake with an alcoholic beverage in it before - other desserts, yes... but not cheesecake.  I wasn't sure if it would work, but it did.  I added one tablespoon of Amaretto to the batter, plus I combined that wonderful San Saba River Pecan Company Peach Pecan Amaretto preserves with some Amaretto and swirled it all into the middle.  I just poured half the batter in, swirled in dollops of the preserve mixture, and topped it with the rest of the batter. I used the remaining preserves and put them in a food processor along with more Amaretto and a little powdered sugar to make the glaze and the finished it off with some fresh white peach slices in the center and some chopped cinnamon pecans.  I was hoping  the little chunks of peach and the pecans in the preserves wouldn't sink all the way to the bottom of the batter, and they didn't but they did sink a little.


Next time, maybe I'll add a little more of the batter to the bottom layer and see what happens, and perhaps try adding a little peach nectar to the batter, but I don't want to overpower the delicate flavor of the Amaretto, so I'm not sure about that.  I also decreased the amount of sugar in my basic recipe to account for the sweetness of the preserves.  It was just right.  I'm happy with this one.  It's almost time to start seeking inspiration for the next one!  I hope I still fit through the pantry door by the time I'm over this crazy cheesecake obsession I'm in the midst of.  Stay tuned!


Friday, July 24, 2015

The Great San Saba River Pecan Company

As I was in the pantry last week, seeking inspiration for another good cheesecake idea, low and behold, it practically jumped right off the shelf and broke the idea light bulb hovering over my head.
I'm talkin' bout the Peach Pecan and Amaretto Preserves produced by The Great San Saba River Pecan Company in San Saba, Texas. 

About five or six years ago, I received a jar of it in a Christmas gift basket from one of my sisters who found it in a gift shop in Fredericksburg, Texas. I was hooked as soon as I tasted it for the first time! The fruit isn't mushy - the combination of textures with the peaches and pecans is perfect.  I actually use it more for baking than spreading on hot buttery biscuits or toast, but if I don't stop talking about it pretty soon, I may just have to go open a jar and slap some onto a cracker before I can even finish gushing over how good it is here.


You can visit the Company's site at  http://greatpecans.com/index.htm and see all the other items they have available besides the one I'm so crazy about.  Their pecans are beautiful, and they offer a variety of great products.  One of these days, I'm going there!

I had to do a little research in my area to locate the nearest place to buy the preserves, but no need to panic, since I can always buy them online if I need to.  Anyway.... back to the cheesecake inspiration thing.  I just finished tweaking the recipe, so next up is a Peach Pecan and Amaretto cheesecake, which will include fresh peaches as well.  I'm pretty excited about this one.  If I'm the only one in my house that likes it, that's fine.  One me, one cheesecake, one fork..... no problem!

Thursday, July 16, 2015

The Glorious Spoons of Spoon City Kitchen

I have absolutely no earthly idea why I'm so obsessed with spoons.  Mostly wooden spoons, but other spoons too.  I can't resist checking them out when I'm in a retail setting, or even if I'm shopping online.  I'm just spoon crazy, I suppose, but that's pretty harmless, right?  I mean there are worse kinds of crazy out there I could have been besides just spoon crazy.

I have a long personal history with wooden spoons - going all the way back to my childhood.  That's when I first took real notice of them, as my mother was swatting me on the bottom with one. My punishment for doing something I shouldn't have. There were five of us kids, and we all remember the wooden spoon whippings.  More than a few of those spoons sustained broken handles over the years! You'd think I'd want nothing to do with them ever again after the spoon whipping years, but me and my bottom somehow survived all that and those memories eventually got replaced with better ones.

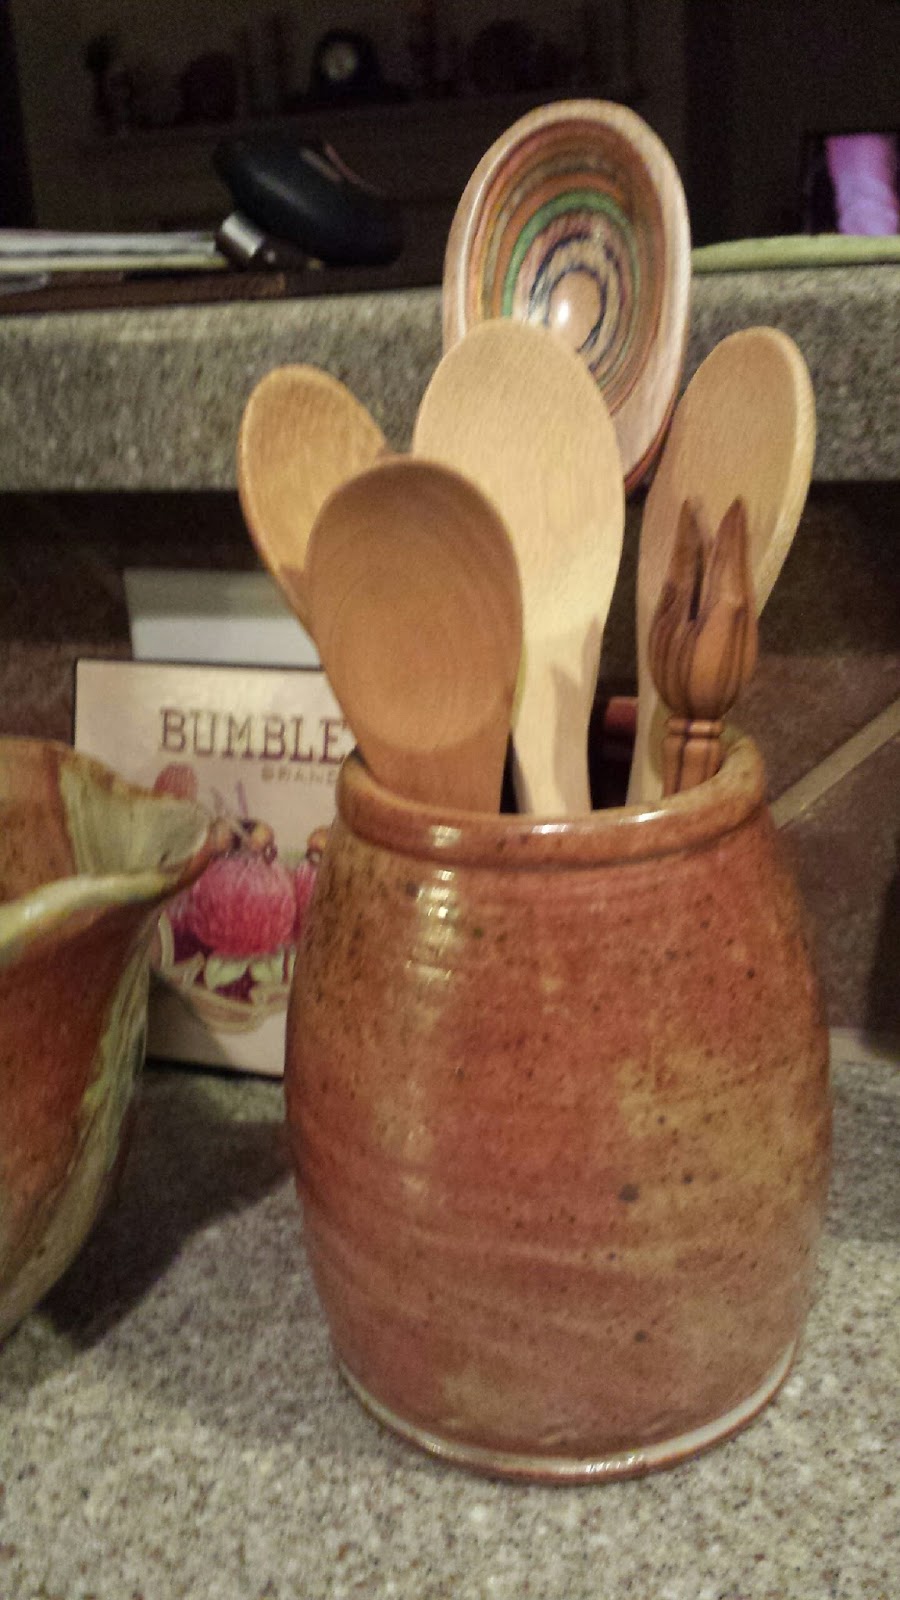
My mother used wooden spoons... lots of them.... when she cooked.  I have two of her spoons, and am so happy to have them now that she is no longer living.  Little things make me happy!  I think of her every time I see them, and sometimes, when I'm cooking a dish that was hers, just the way she used to cook it, I use one of her spoons. Here they are.  I mark them with a M for Mama so I will always know which ones they are.


I also have lots of wooden spoons from far away places.  Most recently, my son and his wife went to Germany and while they were at it, toured Spain, Amsterdam, France, and Switzerland. Before they left, they wanted to know what I wanted from Germany. " Just get me a few wooden spoons", I said.  They came back with thirteen, some from every country they visited.  What a treat!  I was so excited. I haven't used any of them yet. I keep thinking I need to make some specialty dish each country is known for as I use them the first time.  Sheeeeeesh.  That will probably never happen, so I may as well just go ahead and use them.  Here they are:


Then there are these....                               and these.....


and these little ones, none of which are more than 5 inches long..... oh, and that non-spoon thing there, that's an olive pick.  I allow it to mingle with my spoons just because I like it so much. Naturally, it's made of olive wood, as are quite a few of my spoons.


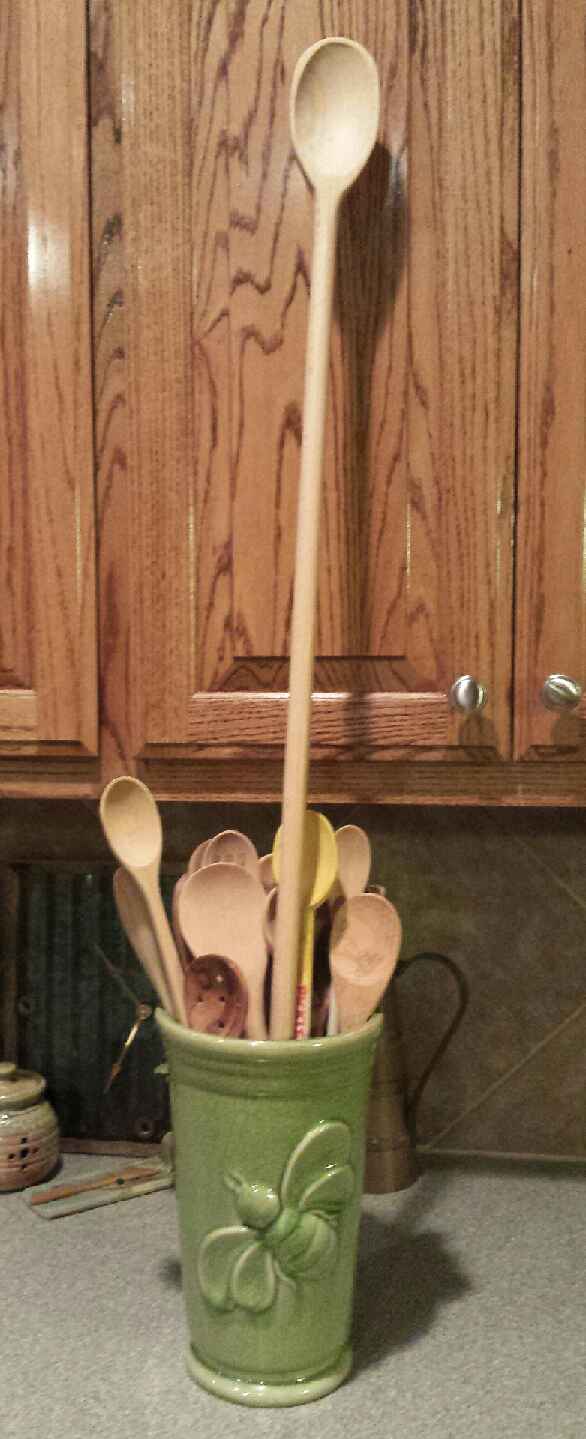
and finally, well almost finally... here is one of two HUGE ones.  I stuck it in with my regular ones so you can see how big it is.  No, I don't use them.  I've had them for almost 30 years. One of these days, who knows?  I might happen upon a really big pot of something that needs to be stirred!


And this, which I lovingly refer to as "the ugly spoonling", because, let's face it.... it IS!  I use it for pickling because the pickling spices stain wooden spoons, so therefore, a designated one.  I never use it for anything else.  Hey... I need to post about my homemade Jalapeno Garlic Dill Pickles one of these days!


I even want to make my own wooden spoons.  I know I can do it..... I'm sure I can, so one of these days, I just might get around to it.  I've only watched a gazillion Youtube videos on the subject. I'm just slightly concerned about all those really sharp hand tools and keeping all my fingers intact during the process. I need all my fingers to get a good grip on my wooden spoons while I'm stirring stuff....

So there you have it, you have officially been introduced to all the spoons of Spoon City Kitchen!


Wednesday, July 15, 2015

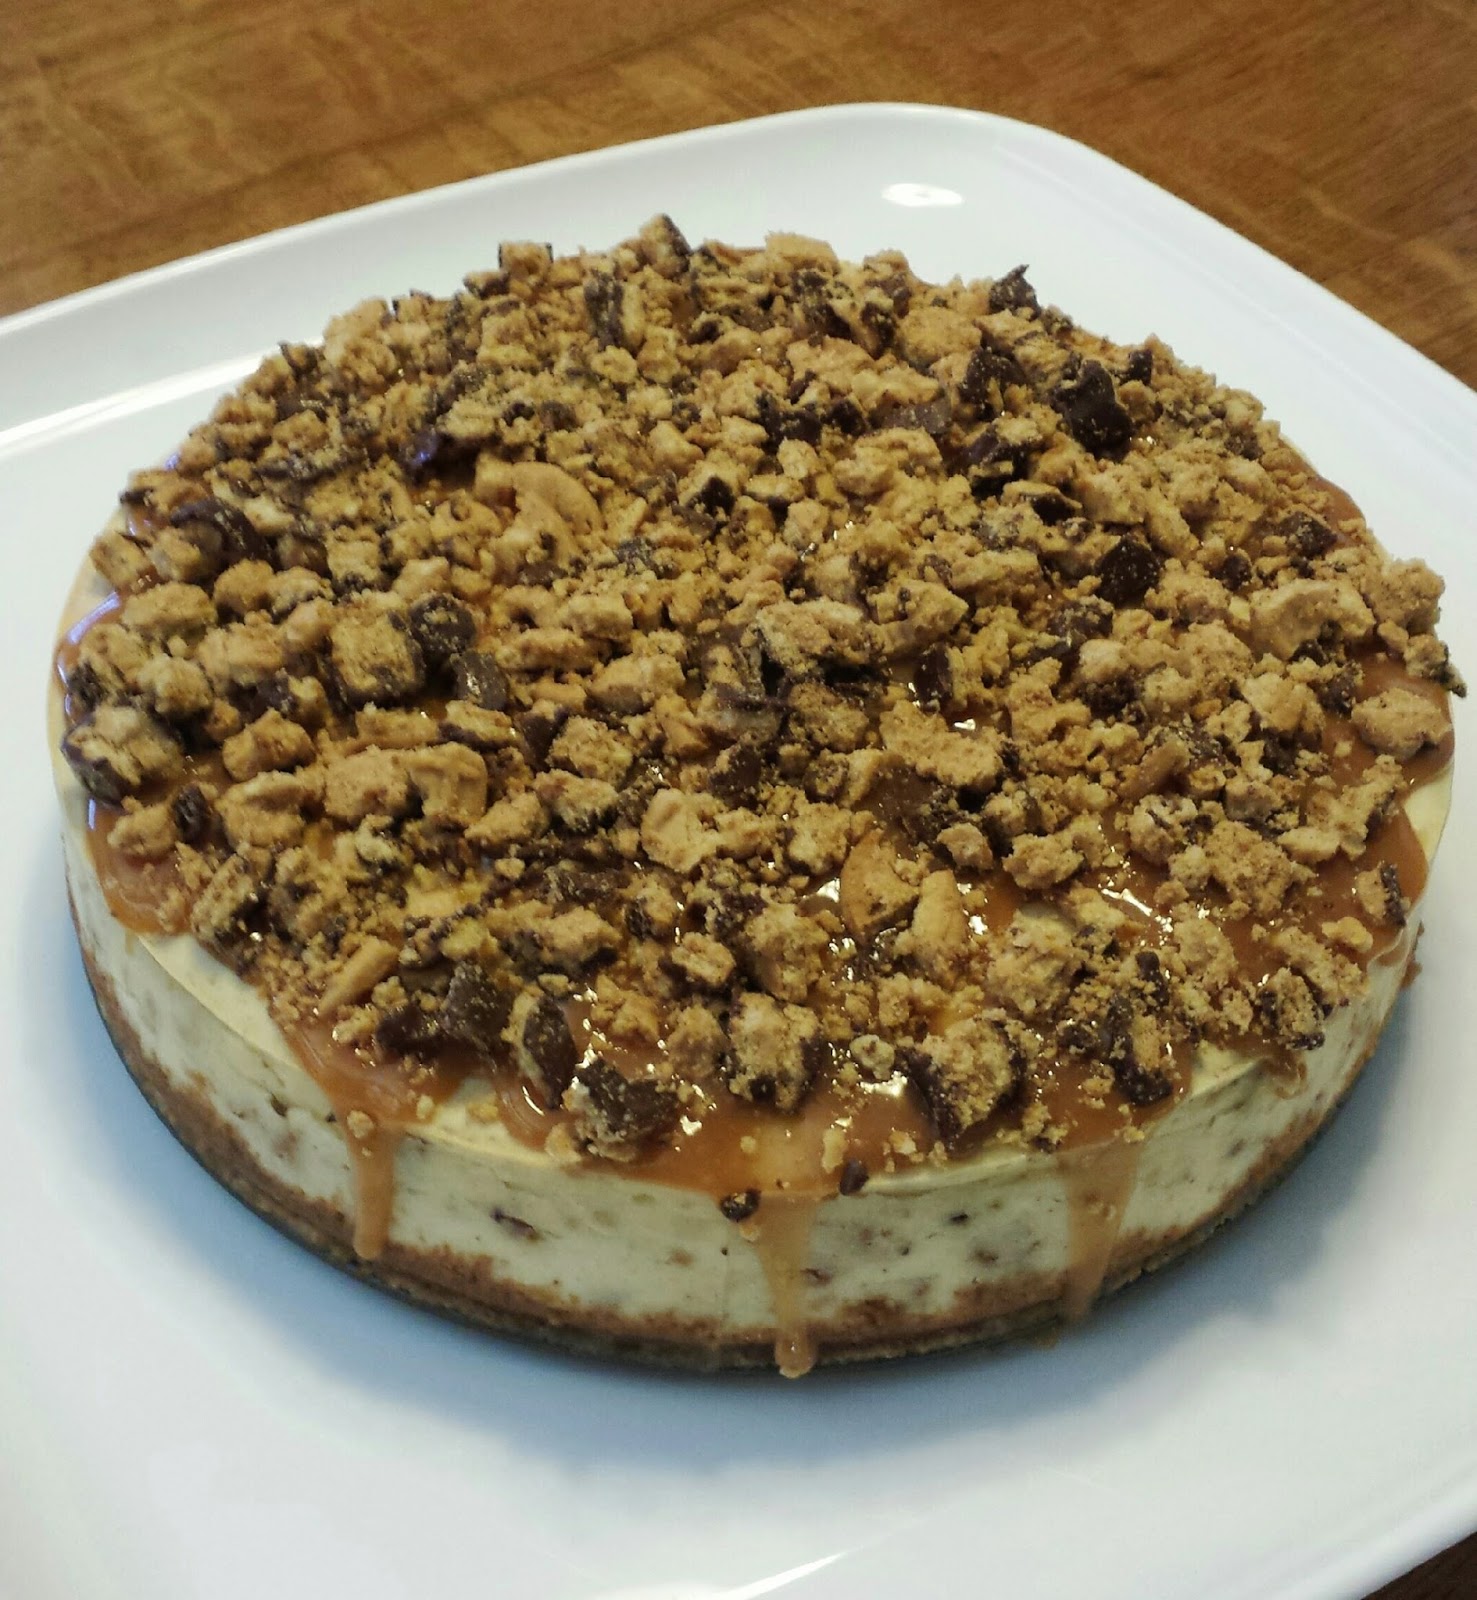
Triple Whammy Nutterbutter Cheesecake!


My inspiration for this one is my son's favorite cookie - Nutterbutter Peanut Butter Sandwich Cookies, and he prefers them dipped in chocolate.  So that's where I began - I dipped cookies in semi-sweet chocolate and allowed them to set before I moved on to the next steps.

This is a triple whammy experience because not only are the chopped dipped cookies folded into the batter, but I also used them to make the crumb crust, and obviously, the top is loaded with the chopped cookies as well, which are resting atop a luscious caramel/peanut butter glaze. 

I'm feeling pretty confident my son will be expecting more of these in his future!

Monday, July 13, 2015

Spicy Cajun Ritz

My husband and I are preparing for a trip to Caddo Lake in East Texas. It will be a great get-together with lots of friends and family, and for me, that means I need to get busy in the kitchen.  Today, I'm doing something that can be done in advance, and these Spicy Cajun Ritz are the perfect thing.  I doubled the recipe because I need that many for our trip since they don't last long anywhere I take them.  This idea came to me a few years after my daughter in law started making saltine crackers in a somewhat similar way, and we just love those things and enjoy them so much every time she makes them.  These are not quite as simple to make, but I love the blend of spices and how baking them in the oven for a few minutes really gets the flavor into the crackers. 

Here's what you need to make them:

3 sleeves Ritz original flavor crackers
1 package  dry Hidden Valley Ranch dressing/dip mix - Fiesta Ranch flavor
1 package dry Hidden Valley Ranch dressing/dip mix - Spicy Ranch flavor
1 tablespoon Dangold Hot & Spicy Cajun Style Spice Blend
3/4 cup canola oil
2 gallon size zip top bags

If you can't find Dangold Cajun Spice Blend, use any other brand!


First, pour the two packages of Hidden Valley mixes and the Cajun spice mix into a medium bowl and whisk them around to mix well.  Then pour the canola oil in and whisk well.  The spices are heavy and will quickly settle to the bottom of the oil, so as you place half of it into each zip top bag, be sure to whisk it well right before doing that.  Once half your liquid spice mixture is in each bag, put 1 and 1/2 sleeves of Ritz crackers into each bag and zip closed, leaving the air space in the bag.  Toss them gently by hand to get all the crackers well coated with the spice mix and set aside.

Preheat your oven to 200 degrees.  I like to line my baking sheets with foil, but it isn't necessary, just time saving.  Use any size baking sheets you have - the smaller, the longer it takes to get them all baked. 
 
They should look like this when wet, ready to bake... all nicely coated!
 
Just before placing them onto the baking sheet, toss the crackers one more time in the bag to make sure they are well coated.  You will always have excess coating in the bag when finished, but I'd rather make sure the crackers are all really well coated than not.  You can experiment with using less oil if you prefer.  

Once the crackers are lined up single layer on the baking sheet, place it in the oven and set a timer for 2 minutes, then remove them, flip all the crackers (you can do this with your hands, they aren't hot enough to burn you), and then return them to the oven and set the timer for another 2 minutes. 

Once both sides have baked for 2 minutes, remove from the oven and place on a long sheet of foil to cool completely to room temperature before you store them in an air tight container. 

The spices can burn if you bake these at a higher temperature, so I don't recommend doing that. These crackers stay nice and crispy for as long as they will last before someone finishes them off!

Here mine are, ready to make the trip to East Texas.  I'm pretty sure this container will be empty when I bring it back home!
 
This is my favorite Cajun spice blend ever.  It's made by Dangold, and I first discovered it at a HomeGoods store nearby, but of course, I couldn't always find it there when I needed it, so I began ordering it six bottles at a time online so I never have to worry about running out.... it's THAT good!