Wednesday, January 11, 2017

Fresh French Bread

It can't get any fresher than right out of your own oven, baked with love and... patience!  My French loaves take a bit longer than my white bread since the dough has to rise three times instead of 2, thus more kneading time as well, but the end result is so worth it!  If you enjoy baking breads and haven't made French bread yet, give it a try!  These are not crunchy baguette loaves, this is a beautiful soft loaf with a crust that's just right.  I'm making it today to serve with spaghetti.  I'll slice and butter it and toast it in the oven broiler. 

Here's what you need:

2 1/2 cups warm water (110 - 115 degrees)
2 tablespoons instant rapid rise yeast
3 tablespoons sugar
2 tablespoons white vinegar
1 tablespoon salt (yes, tablespoon!)
1/3 cup vegetable oil
6 1/2 to 7 cups bread flour
1 egg, well beaten
1 tablespoon water
Extra vegetable oil for oiling bread rising bowl
Extra flour for kneading surface
Yellow cornmeal
Non-stick cooking spray
Thermometer, if necessary

Here's the end result!


First, get your warm water to between 110 and 115 degrees.  I suggest using a thermometer to check the temperature if you aren't an experienced bread baker.  Too cool won't activate the yeast, and too warm will deactivate it.  Add the yeast and sugar into the warm water and set aside.  If you fail to get this beautiful foam action after about 5 to 8 minutes, discard and start over.  Be sure to use fresh yeast - check the expiration date!
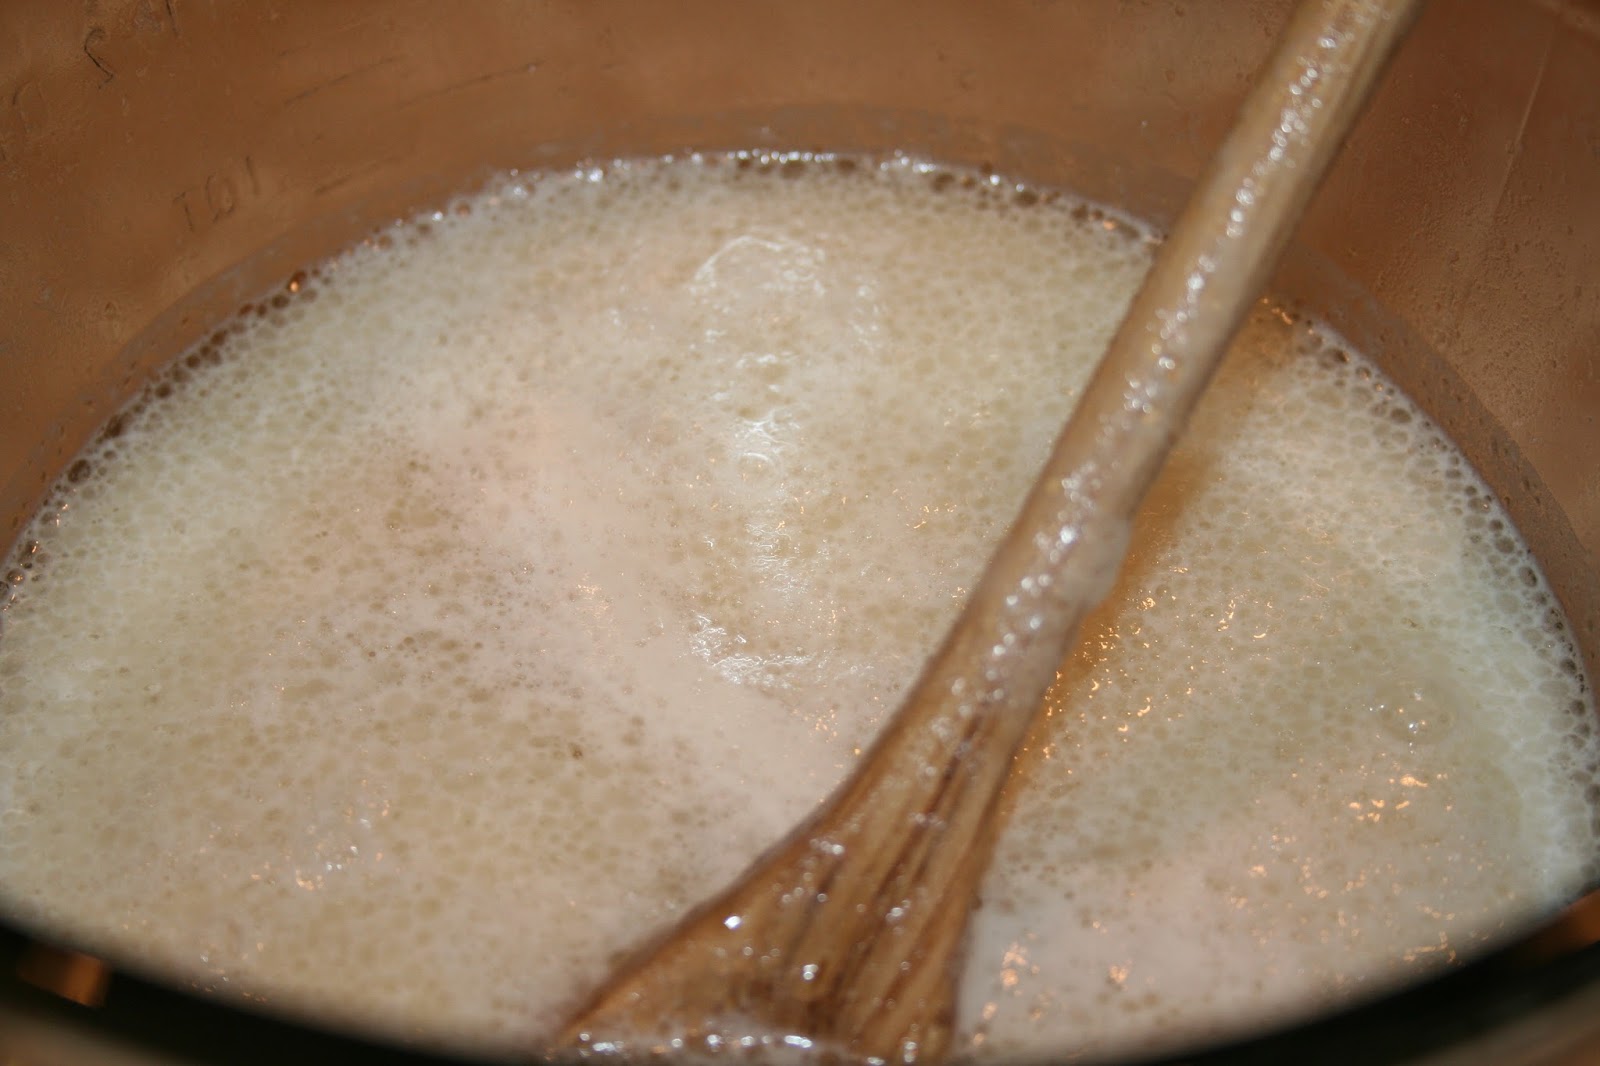
Once your yeast is happy, foaming away, add the vinegar, salt, and oil and stir in.  You will actually need to use a larger container than I used to put my yeast in, which was a 4 cup measure.  I had to transfer it to a larger bowl to add the vinegar, salt and oil.  Use glass containers, by the way... not metal.

Next, measure your flour into a large mixing bowl.  "Fluff" the flour by filling your measuring cup and dumping it back into the flour container 3 times before scooping up your cup to use.  Do this each time you measure another cup, and you will avoid a dough that will be too dry due to too much flour.  I start with 6 1/2 cups of flour, adding the liquid to it about a fourth at a time and mixing it in gently with a big old wooden spoon...

This is after the first 1/4 of the liquid is mixed...

mixing the second amount of liquid...

and here, I'm mixing in the last of the liquid.


After spreading some flour onto your kneading surface, place the dough onto it and knead for a full 10 minutes.  This is where the "up to 7 cups" of flour comes in.  You will need to add flour to your kneading surface until it's not sticky as you knead.  Keep your hands floured as well.  If you have never kneaded bread dough before, I suggest you check out a Youtube video so you can get a great visual on exactly how to do it properly.  If you have little globs of dough stuck to your kneading surface, just get those out of the way by scraping them off with a bench scraper or the edge of a metal spatula.  Keep your kneading surface smooth and "glob free". :) 

Here's the dough after my 10 minutes of kneading.

Place it in a large oiled bowl, turn it to coat all around with the oil, then cover loosely with plastic wrap, leaving a vent hole, in a non-drafty place.  It only takes this dough about 30 to 40 minutes to rise.  You want it to double in size, or nearly.

Here it is, doubled.  Now, lightly flour your kneading surface, and this time, knead only for about 4 minutes.  Use much less flour, or none, only as much as required to prevent stickiness. Usually, the oil on the surface of the dough ball prevents stickiness at this point while kneading for such a short time.  Return to the bowl, allow to rise again as before, and then repeat the process one more time.  This will be a total of 3 times the dough will rise in the bowl.

After the third rise, using a sharp knife or bench scraper, divide the dough in half.  Gently roll the two halves into logs and place them both on a large baking sheet which has been sprayed with non-stick cooking spray and lightly sprinkled with yellow cornmeal.   Using a sharp knife, cut about 5 slashes into the top of each loaf, not cutting all the way through, as seen below.


Prepare an egg wash by whisking the egg in a small bowl well with a fork, then add the tablespoon of water and mix well again.  Brush the egg wash all over the surface of the two loaves.

Bake the loaves at 375 in a pre-heated oven.  I prefer using a shiny cookie sheet to bake mine on. 
I set my timer for 25 minutes, and check the loaves at that point.  I observe the color (you don't want them too dark, as seen here is perfect), and I tap the top of the loaves with my fingers and listen for a "hollow" sound.  I gave these loaves another 2 minutes of baking after checking them.  Every oven is different, and knowing when a bread is done comes with experience as well.


This bread has a thin, beautiful crust and a soft interior with a wonderful texture.  This is the only French bread recipe I ever use.... it's so good!  But I won't take my own word for it... I'll gladly verify that by cutting me a piece, slathering it with butter, and getting a true confirmation, so, 'scuse me while I go do that... while it's still warm from the oven. 


Tuesday, January 10, 2017

Burrito Day!

I recently restocked my freezer with breakfast and lunch burritos for my husband and posted a picture of them on Facebook.  My son saw the post and proceeded to ask me where HIS were, so today I'm back at it for him. 

These things are so simple, really.... but honestly, if you're making 40 of them like I am today, it's pretty darn time consuming.  Having said that, I never regret having done it after the fact.  We put a package of three into the fridge, and my husband grabs one and off to work he goes, a happy guy.

Here's what I use to make 40 at a time, just in case somebody out there wants to do this.  I have no idea how likely that is, but anyway.... here we go...

6 pounds lean hamburger meat
5 pounds finely grated Mexican blend cheese
40 burrito size flour tortillas 
6 packages of taco or burrito seasoning mix (1 for each pound of meat)

I get all of the above ingredients at my local food warehouse (Sam's / Costco) The burrito size tortillas come 40 to a package, which is perfect, and they're Mission brand, which is what I prefer.
It takes 1 of the large family size hamburger meat... just find one that's close to 6 pounds.  The Taco seasoning packets even come 12 packets to a box and lasts me 2 "burrito-making" events.  The cheese is available in a 5 pound bag.  It's an easy one-stop shop for me to get everything I need in one place.

Now, I know not everybody out there wants plain ole meat and cheese burritos, but my son gets them just how he wants them!  You can add all sorts of things to them, like green chilies, salsa, pepper jack cheese, onions, jalapeno peppers.... the list could go on and on.  Make 'em how you want!

  Here's what's headed for the freezer!

 Start out by browning all the meat.  I do this in a big pot, in two batches.

 After browning each pot of the meat, I drain it really well.


Here's the other stuff !

After the meat's all browned, back to the big pot it goes...


and the taco seasoning all gets dumped right on top.


I don't add as much water as the packet calls for because I don't want the filling to be too wet.
The brand I used called for 3/4 cup of water per packet, and I used a little less than 1/2 cup.


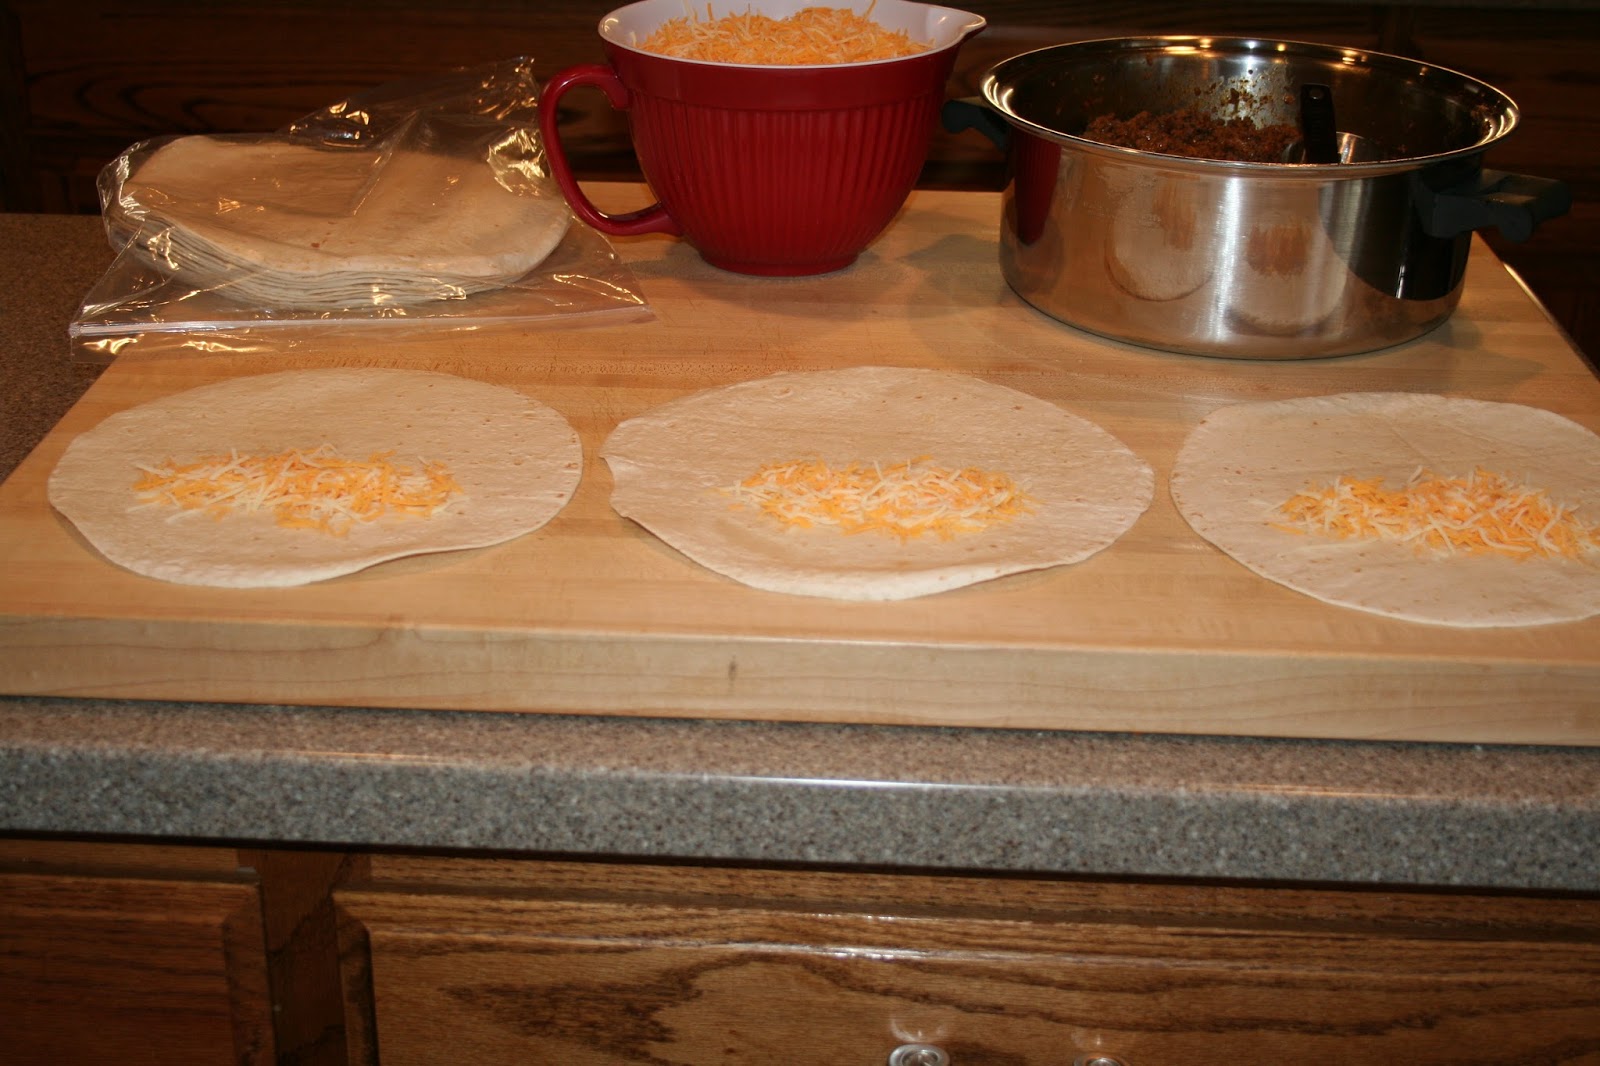
Time to start the assembly line!  I like to make 3 at a time, since that's how many fit across my board.
I'm generous with the amounts of meat and cheese, I mean... who likes a wimpy burrito?

I start with a layer of cheese on the bottom, then add the meat...


then top the meat with more cheese.  Is there such a thing as too much cheese?

Time to roll this baby up.  Here's how I do it.  Fold the two sides in first,


 The turn the front side up....

and roll away.

Keep it "seam side" down to wrap it.

I just wrap them in plastic wrap.

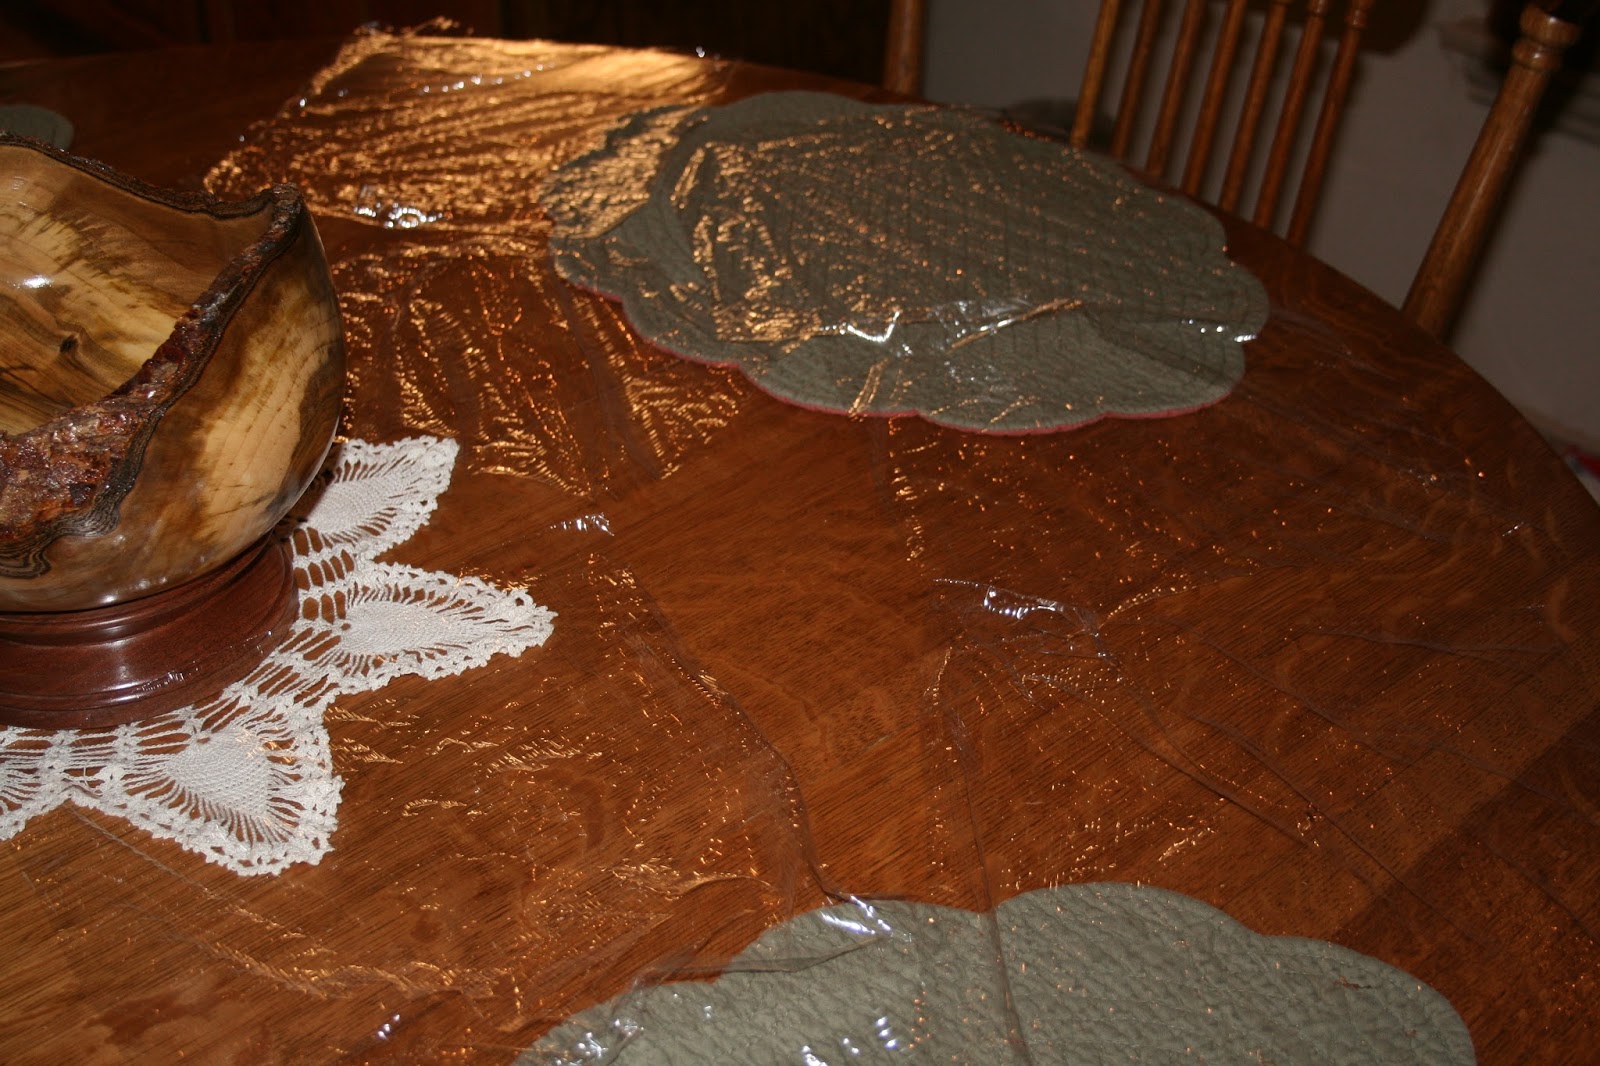
Plastic wrap is grouchy stuff to work with sometimes.  We don't always get along, so to minimize my frustration level, I just pull off all the sheets I will need at one time.  That means they're all over any empty space in the kitch I can find to put them.

Once they are all wrapped up, I label quart size zip lock bags and 3 will fit to a bag.

 Done!!

Here's what can happen sometimes... a blow out!! This one will go to the fridge and my husband will gladly gobble it up at some point.

Out of all the ingredients purchased for these burritos, this is all I have left... one quart size bag of the grated cheese.  I won't have a problem using this up.

One of these days... but not THIS day... I'll figure out what the actual expense per burrito is. Well, maybe I will.  Someday.... maybe.... or not.

Sunday, January 1, 2017

New Year's Day Cabbage Casserole

Ok, so not everybody enjoys eating cabbage, but I do, and I make many different variations of cabbage casseroles.  This dish is actually really easy to switch up, using different meats and sauce combinations.  Today, I'm going with smoked sausage and caramelized onions, with a cheesy sauce.

If you want to try it, here's what you will need:

1 pkg Eckrich (or any kind you want to use) smoked sausage
1 large onion, diced
1 heaping teaspoon minced garlic (fresh, jarred, or powder will work, just not garlic salt)
1 large head of green cabbage, cut up
1 can broccoli cheese soup
2 tablespoons cream cheese (garden vegetable or plain)
1/3 cup heavy whipping cream
1/2 cup finely shredded colby jack or other cheese (plus extra to top casserole with)
1 tablespoon butter + 1 tablespoon olive oil (to caramelize onion in)
Optional:  French's Fried Onions, crisped in the oven


I start out by slicing the smoked sausage and getting some nice color on it.  This not only enhances the flavor - it also just looks more appetizing.  Once you get it browned to your liking, set it aside.


Next, I caramelize a diced up large onion in my iron skillet.  I put 1 tablespoon of butter and 1 tablespoon of olive oil in the skillet and cook the onion on medium high heat until it gets to the level of caramelization I want.  Is caramelization an actual word?  I'm not sure, but I don't especially care! Once you're about 30 seconds from "happy" with the onion, add 1 heaping teaspoon of minced garlic and stir it in, then remove from the heat and set aside. 

Here's the onion, sizzling right along... on it's way to being caramelized.


It's time to cook the cabbage.  For this dish, I don't bother with cooking it in broth or anything flavor enhanced, since all the flavor will be coming from the sauce.  Cook it how you like.  I just put about 2 inches of water into a large pot, chop up one large head of cabbage, toss it into the pot, cover it, and let it cook until it's tender but not tooooooo soft, since it's going into the oven and will cook more.  Be sure to drain the cooked cabbage well in a colander before adding it to the casserole.


While the cabbage is cooking, I prepare the sauce, which goes together pretty quickly.


Salt & pepper, cream cheese, a can of Broccoli Cheese soup, heavy whipping cream, and finely grated cheese.  I'm using Colby Jack here, but this is really good with Pepper Jack if you like it a little spicy.

Combine the soup, 2 heaping tablespoons of cream cheese (I'm using garden vegetable flavor here), 1/3 cup heavy whipping cream, 1/2 cup grated cheese, and salt and pepper to taste.  Mix well, then add the caramelized onion / garlic and mix again.  That's it for the sauce! It should be thick, but easy to spread.


Now, a layering process begins.  Spray a 9x13 baking dish with non-stick cooking spray.  Spread about 1/3 of the sauce into the bottom of it. 

Next, add half of the cabbage, and top the cabbage with about half of the sausage.


Then top the sausage with another 1/3 of the sauce and top with the remaining half of the cabbage and sausage.


Dollop the remaining sauce onto the sausage and spread it around.


Now just top it off with a sprinkling of grated cheese, and it's ready for the oven.


Everything in it is already fully cooked, so it only needs to bake until it's nice and hot.... all bubbly with the cheese melted on top.  About 25 minutes should do it! 


Done!


As you can see, the sauce remains thick and is not runny.


I like the crunch the fried onions lend to this dish.  I spray a baking sheet with non-stick cooking spray and pop them in the oven for about 5 minutes at 350 degrees, and they come out nice and crunchy and more flavorful.  I don't recommend just using them right out of the canister they come in. We just scoop some of them up from the baking sheet and sprinkle them over the top.  That way, you can get as much crunch as you want!  If you prefer to add them directly to the top of the casserole while it's baking, you would have to do it in the last 5 minutes or so to prevent burning, because they brown quickly.

If you're a cornbread person, this is really good served up with some good old Southern skillet cornbread. Since it is New Year's Day, some of you may notice there are no black eyed peas on the plate.  Alas, my husband doesn't like them, so I don't bother to cook them just for me.  It's a good thing I don't actually concern myself with matters of "luck", good or bad.
Happy New Year!!

Friday, August 19, 2016

"The Birthday Cake"

Maybe it's a little strange, but I bake my own birthday cake pretty much every year. That way, I get exactly what I want. Tomorrow is the big day, so I'm getting this done tonight.  Now, usually I end up with a fresh strawberry cheesecake, but this year, I was in the mood for some serious chocolate.  So, rather than make one I've made before, I decided to be daring in my old age and try something completely different.  I went online (Pinterest... one of my favorite go-to places for browsing delish looking stuff to eat) and came upon a recipe for "Nanny's Chocolate Fudge Brownie Cake".  Ok... I like chocolate fudge!  I like brownies!  I like cake!  By cracky, I'm gonna try this.

Now mind you this was weeks ago.  After all, you have to plan in advance for something so earth shattering as your GASP...... 63rd birthday.  Ok, I said it, and it's the truth. 

I passed the recipe on to a couple of friends, just because it looked good and it was so darn easy to make.  One of them passed it along to her sister, who made it.  She said it was a keeper, so right then and there, I decided this was it, I'm making this thing for my birthday this year!

Here's the ridiculously simple recipe:

In a large bowl, combine the following 5 ingredients:


  • 1 box chocolate cake mix (I used Duncan Hines Devil's Food)
  • 1 box Duncan Hines Decadent Brownies (I went with the California Walnut one)
  • 4 eggs
  • 1 & 1/4 cups water
  • 1 cup vegetable oil
Now, the recipe said, "In a bowl add the cake mix, brownie mix, oil, eggs, and water. Pour into bundt pan......  


I decided to mix all the ingredients up with my hand mixer before pouring it into the pan. :) 
Anyway...  back to the recipe....  

The recipe said.... Preheat the oven to 350 degrees.  Prepare a bundt pan with non-stick cooking spray and a light coating of flour or you can use Baker's Joy.


I decided to prepare my pan the way I like, which is coating it generously with non-stick cooking spray and then mixing about a half a cup of sugar and a heaping teaspoon of cinnamon up and dumping it into the sprayed pan to coat it all over.  The cinnamon ends up mostly on the bottom, and the cake will absolutely not stick to the pan.  You don't need flour.  This creates a really nice light crunch of cinnamon and sugar all around the cake, and it's so good!  I do this with just about every recipe I think cinnamon would work well with, and that's lots of them.

The recipe said... bake 50 to 55 minutes, and that was pretty close to how long it took mine.  I used my good old trusty shiny tube pan.  If you use dark pans, your baking time will probably be a bit shorter, so use a toothpick or cake tester for doneness.  Nobody wants a dry cake, although I didn't think that would be possible here, considering it called for an entire CUP of oil... oh well, it's a birthday cake..... happens once a year, so I'm splurging already....


After you remove the cake from the oven, let it rest in the pan for 10 minutes and then remove it to a cooling rack.  While it's still warm, you use the final ingredient, which is a ready made container of your favorite chocolate icing.

 The recipe said... put 1/2 of the tub of icing in a small bowl and microwave it for 30 to 45 seconds until it is able to be drizzled over the cake.  Well, this is America, and it's my birthday, and it's a Friday night, and it rained today, and, and....I used the WHOLE thing!


So, there you have it.  I can officially say that it's good.  I agree with my friend's sister... it's a keeper.

Happy Birthday to ME!!


Tuesday, August 2, 2016

Really Good Everyday White Bread

I had a friend in high school that was crazy about baking bread, surprisingly to me, at that young age, but she used a recipe very similar to this one, except she added honey to it.  It was so good, and so is this.  So good, in fact, that I have dared not mess with it, not even to try and add honey.  I can't credit this recipe to anyone because I have no idea where it originated from, but it's the one I can depend on every single time to come out perfect.
I'm pleased that it only requires 6 simple, basic ingredients and that it only takes about two and a half hours of my time to make it happen.  I know bread baking can be a challenge to a beginner... it certainly was for me, so I've tried to really share the details and tips I've learned along the way here for you beginners out there.  Experienced bakers should have no problems whipping this one out!

Here it is, ready for the first rise.


Here are those 6 ingredients:

2 cups warm water (110 degrees F  /  45 degrees C)
2/3 cup white sugar
1 & 1/2 tablespoons active dry yeast
1 & 1/2 teaspoons salt
1/4 cup vegetable oil
6 cups bread flour

and the directions are:

1. In a large bowl, dissolve the sugar in the warm water and then stir in the yeast.  Allow to proof until yeast resembles a creamy foam.  You should see some bubbles on top.
2. Mix the salt and oil into the yeast.  Then mix the flour in one cup at a time. I just mix the first three cups of flour in with a sturdy wooden spoon one at a time, and then after that, use my bare (clean) hands. Not quite all of the flour is picked up by the dough, there's a thin layer still left at the bottom.  It's okay.  You don't have to use a stand mixer to get your dough to come together.  Just be sure to knead properly.  Knead dough on a lightly floured surface until smooth.  (about 8 to 10 minutes) Place dough in a well oiled bowl and turn to coat all over. Cover loosely with plastic wrap and allow to rise until doubled in bulk, which should take about an hour.
3. Punch dough down and knead for 2 - 3 minutes, then divide in half.  Shape each half into loaves and place into 2 well oiled  9 x 5 loaf pans. I spray the pans generously with non-stick cooking spray and it works perfectly.  Cover loosely with plastic wrap and allow to rise for about 30 minutes, or until dough has risen about an inch above the pans.
4. Bake at 350 degrees F. for 30 minutes.
5. Remove from oven and let rest for 5 minutes, then invert pans and remove loaves to a cooling rack.
Brush them with room temperature butter (real butter, people!!!) while still warm.

Next time you get a hankering for some fresh hot bread right out of the oven, try this one.  It's worthy.

Here are a few words of advice from someone (me), who learns something new with just about every baking experience.....
  • Use fresh ingredients, especially the yeast.  Check the expiration date on the yeast and don't use it if it's expired or days from being expired.
  • Use a thermometer if you aren't sure about the temperature of the water.  If you get it too hot, it will kill the yeast, and if it's not hot enough, the yeast will not activate and make that frothy, bubbly stuff on top you need as "proof" it's good.
  • "Fluff" your flour a few times by filling your measuring cup and emptying it back into the flour container before you measure your flour in the measuring cup, and do this for each and every cup you add to your recipe.  Level the flour in your measuring cup with your finger or the edge of a butter knife before adding to your recipe.  These simple steps will prevent your dough from being too dry due to too much flour being added.
  • Knead the dough for the specified time.  It develops the gluten and it's what gives you a nice texture and elasticity.
  • If using dark colored metal pans, you will probably need to adjust your baking time since they bake faster than regular pans, and for that reason, if you use metal, I recommend shiny, regular and not the dark non-stick kind. It's easier to overbake stuff in those dark pans!!
  • Your oven should be properly calibrated for correct temperatures.  You can check to verify by placing an inexpensive oven-proof thermometer into the center of the oven and setting the oven to come to a specific temperature.  If you set it for 350 degrees to check it, but your thermometer reads at 325, your oven is running cool.  You would adjust your temperature up by 25 degrees to 375 to correct it to 350 before baking.  If it's running hot, adjust your temperature down to correct.  
  • Don't place your dough in a drafty place to rise. 
  • Brushing the loaves with butter while warm softens the top crust and makes the loaves more appealing to the eye...... oh... and it tastes so good!
Nice texture... we could hardly wait to taste it!


To wrap this up, I'll just say that I followed this recipe exactly.  The dough behaved exactly as it was supposed to.  It took an hour for my first rise, and 30 minutes for the second one.  They baked to perfection in exactly 30 minutes.  I did use glass pans, which I prefer for bread baking, rather than metal ones. 

I hate to blog and run, but I think I should go see if there's any left, or if the "lover of hot bread right out of the oven" man that lives here has already gobbled it all down.
xoxox


Wednesday, December 30, 2015

Sausage & Cheese Roll-ups

This morning I was in the mood for puff pastry, so for a nice, leisurely, mid-morning breakfast I decided on simple sausage & cheese roll-ups. 


I don't mess with making my own puff pastry, although it isn't that difficult to make.  I use Pepperidge Farm brand.  It's so flaky and delicious, and well, EASY.... why not, right?

To prepare, allow the puff pastry (1 sheet will make 11 roll-ups) to thaw per package directions.
While that's happening, brown about two thirds of a small size tube of your favorite ground breakfast sausage and drain on paper towels.  This recipe is for one sheet only.  Just double the ingredients if you are using both sheets, which will give you 22 roll-ups.

Combine 2 tablespoons of maple syrup and 1 tablespoon of yellow mustard in a small bowl and mix well.  I used Mrs. Butterworth's syrup and Gulden's mustard, but any syrup / mustard combo you wish to use will work.  You can use honey instead of the syrup if you want.

You will also need about 3/4 cup of grated cheese (any kind you like), 1 egg yolk beaten together with a tablespoon of water, some flour, salt and pepper, and a rolling pin.


Once the pastry sheet is thawed, unfold it.  Rub flour onto your rolling pin, then on a well floured surface, roll the pastry sheet out in both directions to thin the pastry and press the fold lines together well. 

Using a pastry brush, brush the syrup and mustard mixture onto the surface of the pastry, avoiding about a 1/2 inch space all the way around the edge.  Sprinkle a thin layer of grated cheese over the brushed area only, then add a layer of the crumbled sausage over the cheese.  Top the sausage with another thin layer of cheese.  Add salt and pepper at this point if you so choose.

Gently roll the pastry up into a log, being careful not to roll it too tightly.  Cut the ends off the roll and discard ( about a half inch on each end should be cut away).  Place the roll-up on a baking sheet seam side down.  To make cutting it into slices easier, chill in the fridge for about 15 minutes.

Preheat your oven to 425 degrees.

Remove from the fridge and, using a sharp serrated knife, slice the log into 11 equal roll-ups and place each one on a baking sheet lightly sprayed with butter flavored non-stick spray.   With a pastry brush, brush the egg wash over the tops and onto the sides of each roll-up all the way around.  Use all of the egg wash.  Just go back over the tops again until you run out if you had some left over.

Bake until the roll-ups are nicely browned, about 15 to 18 minutes, but baking time will vary depending on your oven.  The interior pastry should not be doughy, so look at the tops of the roll-ups to make sure the center portions of the dough are slightly puffed and flaked in appearance. 

Remove to a wire rack and allow to cool for a few minutes before serving.


My roll-ups are just under 3 inches in diameter.  Two of them with a cup of coffee made me happy, but I won't tell you how many my husband devoured!  He likes them.....

Wednesday, December 9, 2015

Easy Key SubLIME Squares

This recipe is easy and results in a light and flavorful lime-based dessert square that's easy to cut and serve.  I was actually developing a recipe for a Lucky Leaf contest and realized after I finished that the particular product I used (Lucky Leaf Key Lime Pie Filling) didn't qualify.  The contest specifically requires a "fruit pie filling & topping" product, so I have another similar idea in mind with one of the qualifying products.  Since I was so happy with this one, I thought I would share it.

First, the ingredients:


For the crust:
 2 cups graham cracker crumbs, 1/2 cup sugar, 1/2 teaspoon ground cinnamon, and 1 stick of melted butter

For the filling:
1 (21 oz.) can Lucky Leaf Key Lime pie filling
1 can Eagle Brand sweetened condensed milk
1 (8 oz.) brick of softened cream cheese
1/2 cup sugar
2 eggs
2 tablespoons lime juice
Optional:  3 drops green food coloring

To make the crust, combine all the crust ingredients into a medium bowl and stir well with a fork until all crumbs are moistened.  Lightly spray a 9 x 13 inch baking dish with butter flavored non-stick cooking spray.  Pour the crumb mixture into the center of the dish and press into the bottom and halfway up the sides.  Refrigerate while you prepare the filling.


For the filling, in a large mixing bowl, combine the softened cream cheese and sugar and beat until smooth using a hand or stand mixer on high speed.  Add the pie filling, Eagle Brand milk, and lime juice and beat again just until smooth.  Add the eggs, beating again until smooth.  If using food coloring, add it and beat again.  Scrape sides and bottom of bowl and beat for another minute.

Remove baking dish from the fridge and pour the filling into the center.  Spread evenly.  Bake in a 350 degree oven on center rack for 30 minutes.


  The color should not change during baking.  Remove from oven and allow to cool completely at room temperature, then refrigerate at least 4 to 6 hours.

Cut into squares and sprinkle lightly with powdered sugar.  Store in refrigerator. 


If you like these and want to up the pucker power, next time you make them, just add another tablespoon of lime juice and that should do the trick!  They cut beautifully.  I used a cookie spatula to remove the cut squares from the baking dish. 

Now, back to the kitchen to develop that contest recipe using a qualifying ingredient......